yeh yeh taking it easy... ive heard that before!!! hahahaha
main thing is we all had fun!
Project Buzz: 09 Ninja 250r
-
P4nza

- KSRC Contributor

- Posts: 1588
- Joined: Sun May 04, 2008 6:28 pm
- Bike: Don't have one
- State: New South Wales
- Location: Somewhere between EC and OPH >:D
Re: Project Buzz: 09 Ninja 250r
2009 Kwaka Ninja 250R (Charlotte) Roady SOLD :'(
2010 Kwaka Ninja 250R SE (Jenny) Tracky SOLD :'(
Now i got no kwakas to ride! :\
"...I thought my tongue was longer than that!"
Team Crashed 2010
2010 Kwaka Ninja 250R SE (Jenny) Tracky SOLD :'(
Now i got no kwakas to ride! :\
"...I thought my tongue was longer than that!"
Team Crashed 2010
-
MIZ RX3

- KSRC Regular

- Posts: 500
- Joined: Mon Aug 24, 2009 1:38 pm
- Bike: Ninja 250
- State: ACT
- Location: Canberra ACT
Re: Project Buzz: 09 Ninja 250r
Hells Yes we did! Go WhiteGroup Mung Beans on Green 250r's! Very exclusive club!P4nza wrote:yeh yeh taking it easy... ive heard that before!!! hahahaha
main thing is we all had fun!
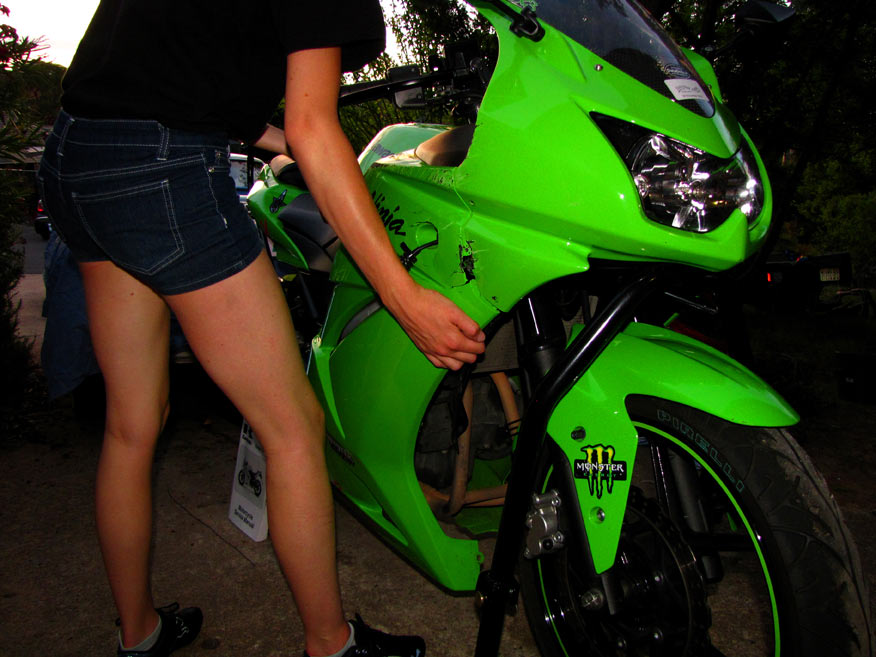
Before EC, Buzz had developed a little bit of a misfire, and not just in a particular rev range either
Anyways, I thought to hell with this and bought some new plugs. They were changed at it's last major service only 2500 kays ago, so i figured it could be something else too, but start with one thing and go from there.
Well bugger me, she runs like a dream! It seems as though a certain Canberra Dealer didnt actually change the plugs at the last service, despite being charged for it! Grrrr! Needless to say she's not going back there again!
I'm currently waiting on delivery of a new Leo Vince Full System from CA Cycleworks in California - The BF decided to surprise me and instead of flowers!!!!
Pink on the outside, but still green on the inside!
-
robracer

- VIP MEMBER

- Posts: 15251
- Joined: Thu Feb 24, 2005 8:23 pm
- Bike: ZX6R
- State: New South Wales
- Location: Port Macquarie
Re: Project Buzz: 09 Ninja 250r
MIZ RX3 wrote:- The BF decided to surprise me and instead of flowers!!!!
-
MIZ RX3
- KSRC Regular
- Posts: 500
- Joined: Mon Aug 24, 2009 1:38 pm
- Bike: Ninja 250
- State: ACT
- Location: Canberra ACT
Re: Project Buzz: 09 Ninja 250r
Well he kinda maybe made a boo-boo that flowers wouldnt have fixed.. LOLrobracer wrote:MIZ RX3 wrote:- The BF decided to surprise me and instead of flowers!!!!nice work miss S
I must Kwakawidow know that it is customary for the other half to purchase big ticket items such as this in lieu of flowers
Pink on the outside, but still green on the inside!
-
P4nza
- KSRC Contributor
- Posts: 1588
- Joined: Sun May 04, 2008 6:28 pm
- Bike: Don't have one
- State: New South Wales
- Location: Somewhere between EC and OPH >:D
Re: Project Buzz: 09 Ninja 250r
ooooo LOL!!! 
2009 Kwaka Ninja 250R (Charlotte) Roady SOLD :'(
2010 Kwaka Ninja 250R SE (Jenny) Tracky SOLD :'(
Now i got no kwakas to ride! :\
"...I thought my tongue was longer than that!"
Team Crashed 2010
2010 Kwaka Ninja 250R SE (Jenny) Tracky SOLD :'(
Now i got no kwakas to ride! :\
"...I thought my tongue was longer than that!"
Team Crashed 2010
-
MIZ RX3
- KSRC Regular
- Posts: 500
- Joined: Mon Aug 24, 2009 1:38 pm
- Bike: Ninja 250
- State: ACT
- Location: Canberra ACT
Re: Project Buzz: 09 Ninja 250r
Well finally my early valentines day gift arrived - A Leo Vince Exhaust System! The BF spotted it at a VERY reduced price at CA Cycleworks and instead of flowers - its the perfect gift!
I couldnt help myself and when it arrived I opened the box for a peek - HOLY MOLY there was some bits an pieces in there!!
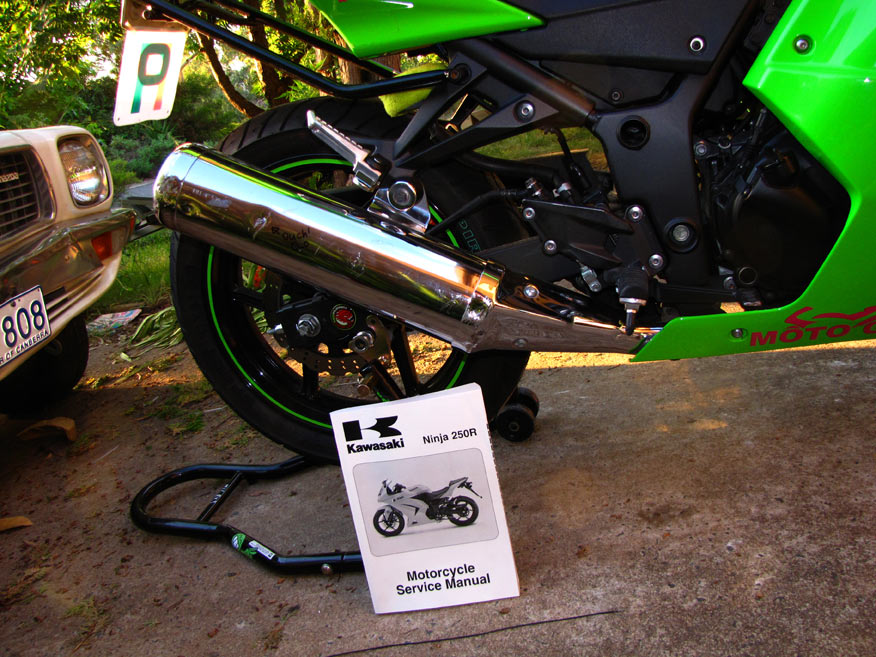
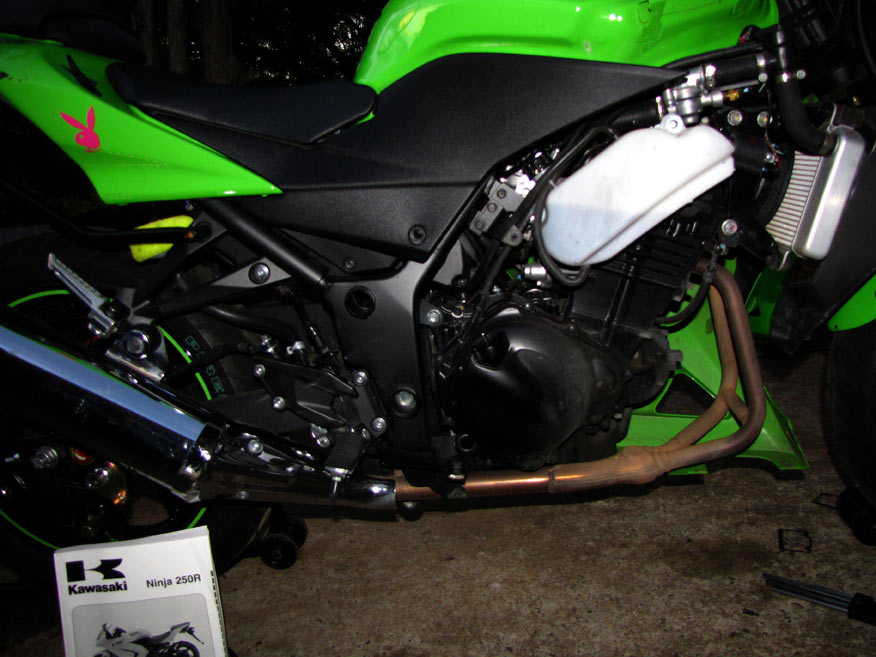
BEFORE shot, Ninja 250r Workshop manual. Not required but can be useful
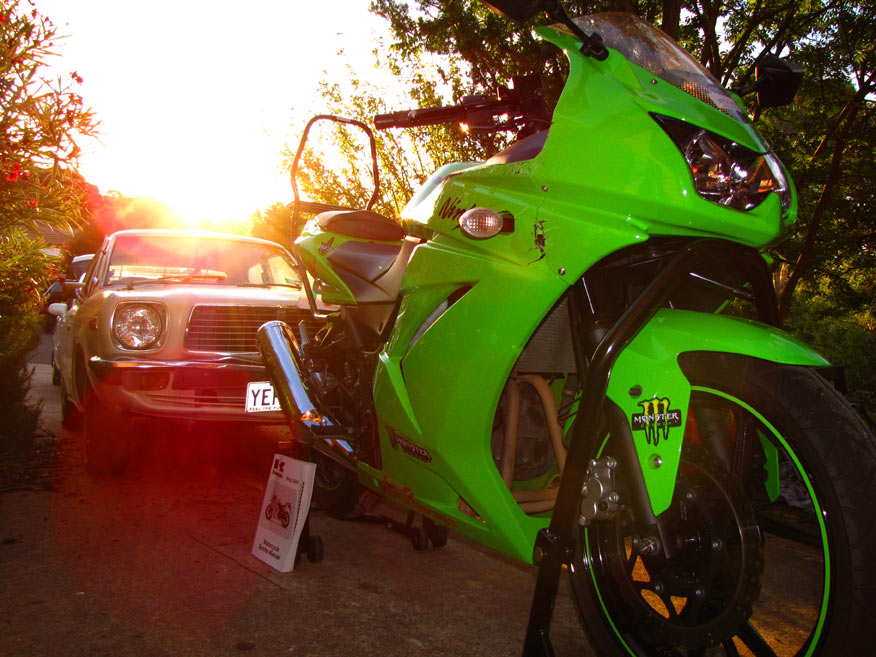
Buzz and a sunset lol
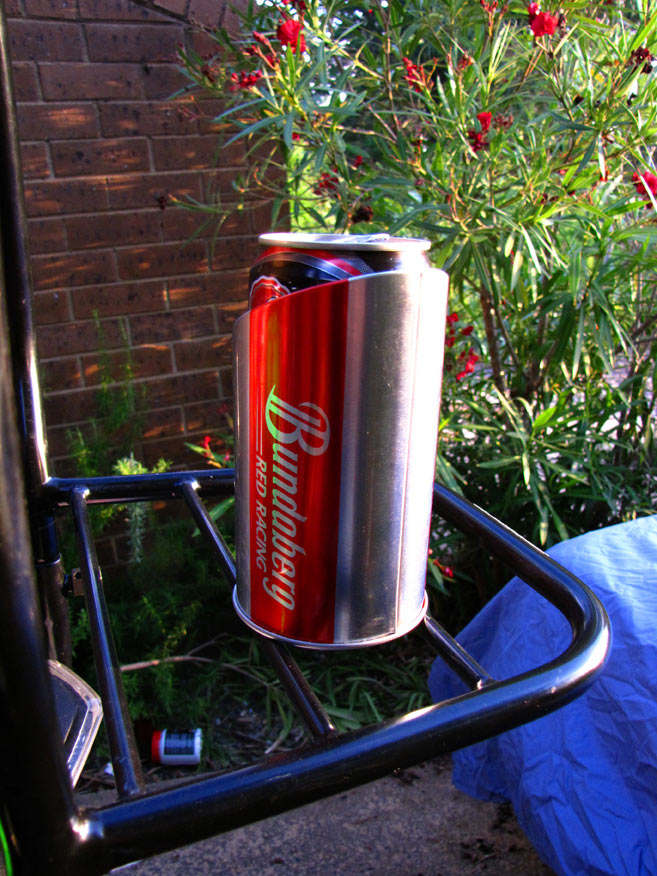
Preparations begin...
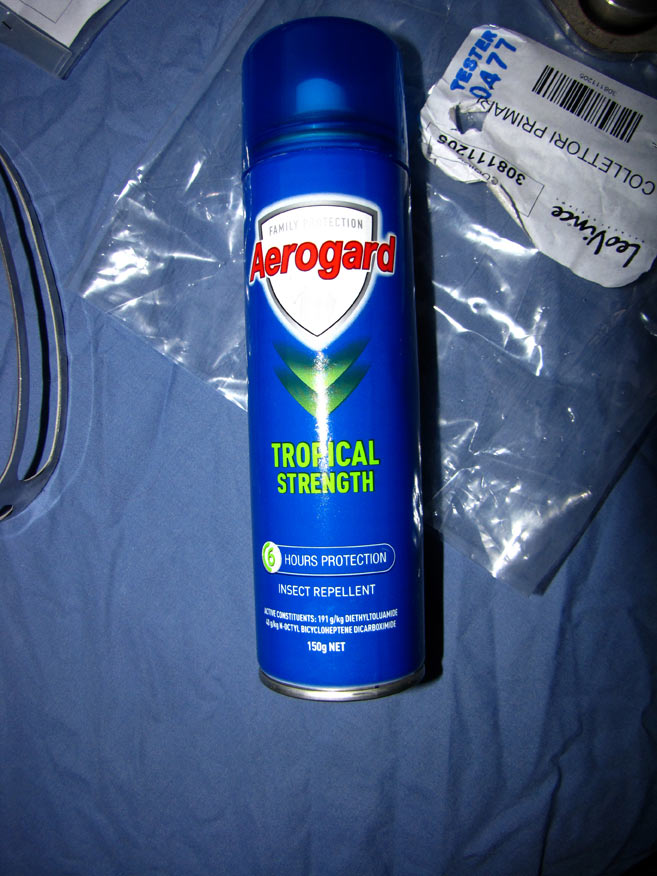
A crucial part of any aftermarket instalation session. Aerogard !
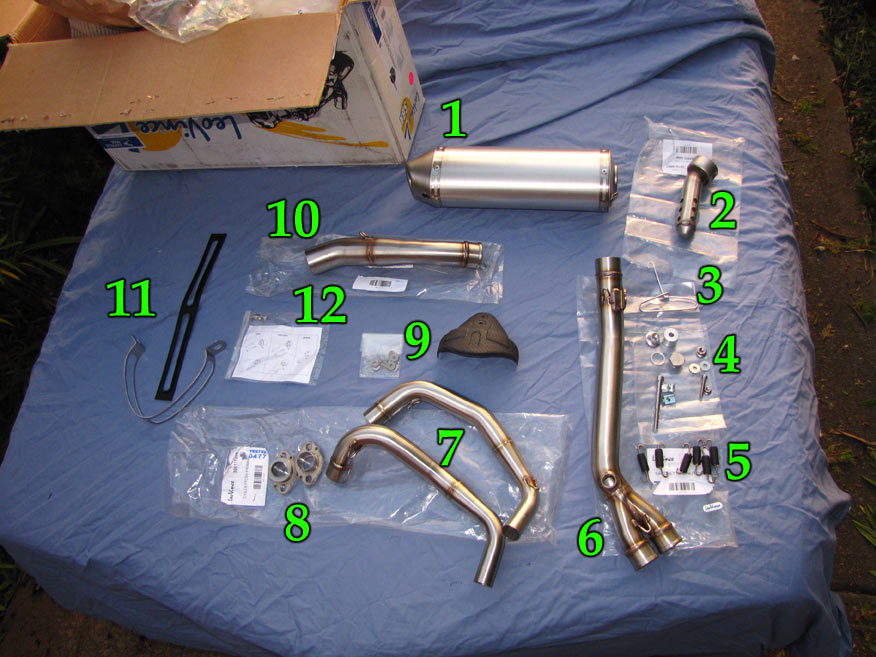
Supplied parts
[FONT=Calibri]1. Muffler (race baffle is installed in it when it is delivered) [/FONT]
[FONT=Calibri]2. [/FONT][FONT=Calibri]Road baffle [/FONT]
[FONT=Calibri]3. Spring puller [/FONT]
[FONT=Calibri]4. Assorted nuts and bolts [/FONT]
[FONT=Calibri]5. Springs to hold everything together [/FONT]
[FONT=Calibri]6. Collector pipe [/FONT]
[FONT=Calibri]7. Header pipes [/FONT]
[FONT=Calibri]8[/FONT][FONT=Calibri]. Exhaust flanges [/FONT]
[FONT=Calibri]9. Heat shield [/FONT]
[FONT=Calibri]10. Collector to muffler link pipe [/FONT]
[FONT=Calibri]11. Exhaust hanger strap [/FONT]
[FONT=Calibri]12. Worlds most useless instructions[/FONT]
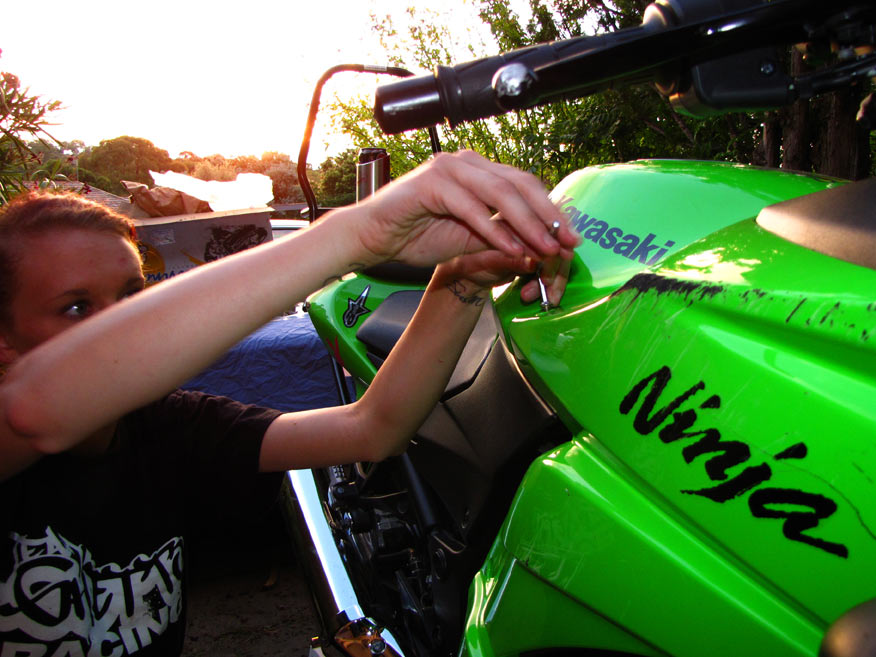
Undoing fairings. There are bolts and plastic rivets and screws that need to be undone.
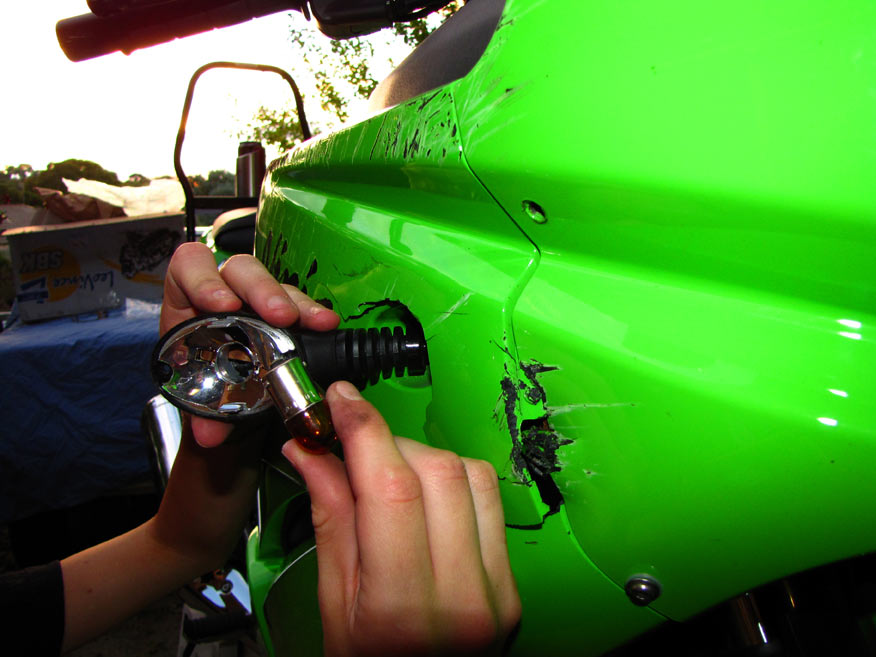
Indicators also have to come off - Pretty simple, just make sure you dont lose the tiny screw.
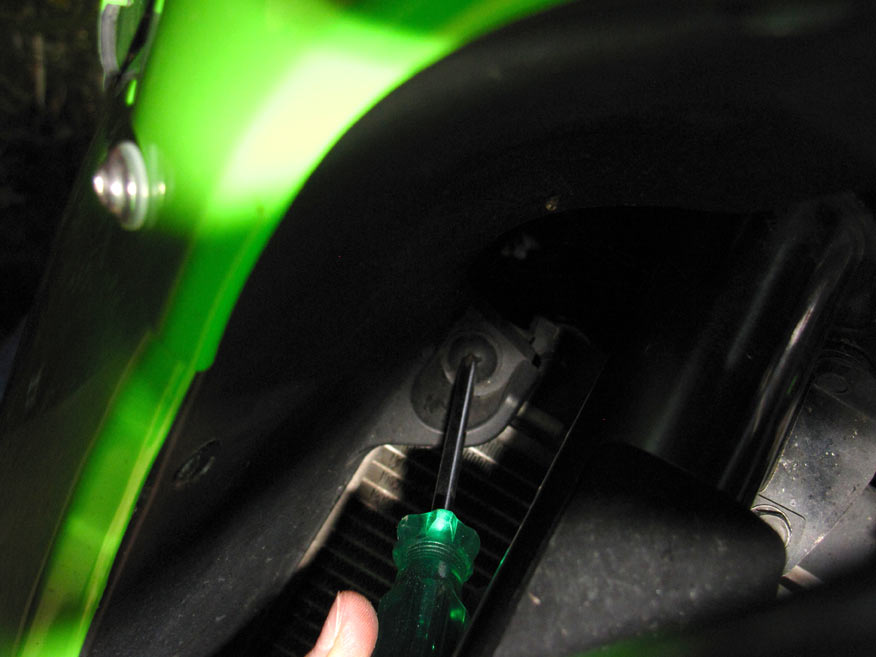
Radiator shroud screw - Dont forget this one!!
Lifting off the fairing. Becareful and make sure you unclip the indicator wiring.
If you try to pull the fairing away too hard, You'll pull the wiring out and or fk it up
Fairing removed. Bit dirty, might do a bit of a clean while I've got it off.
Removing standard heat shroud. 2 x 5mm allen key bolts
Heat shroud is also retained by a hose clamp which has to be loosened. Just a simple phillips head screwdriver does the trick. You have to loosen it enough the Shroud pretty much falls in your lap.
Remove bolt on muffler clamp
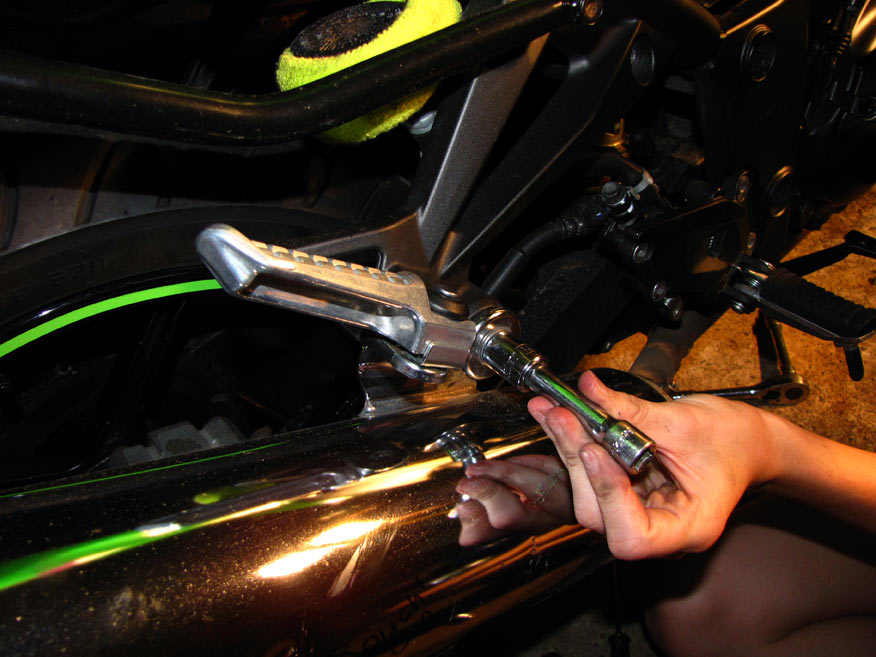
Remove bolt on muffler hanger
Muffler slides off! Simple!
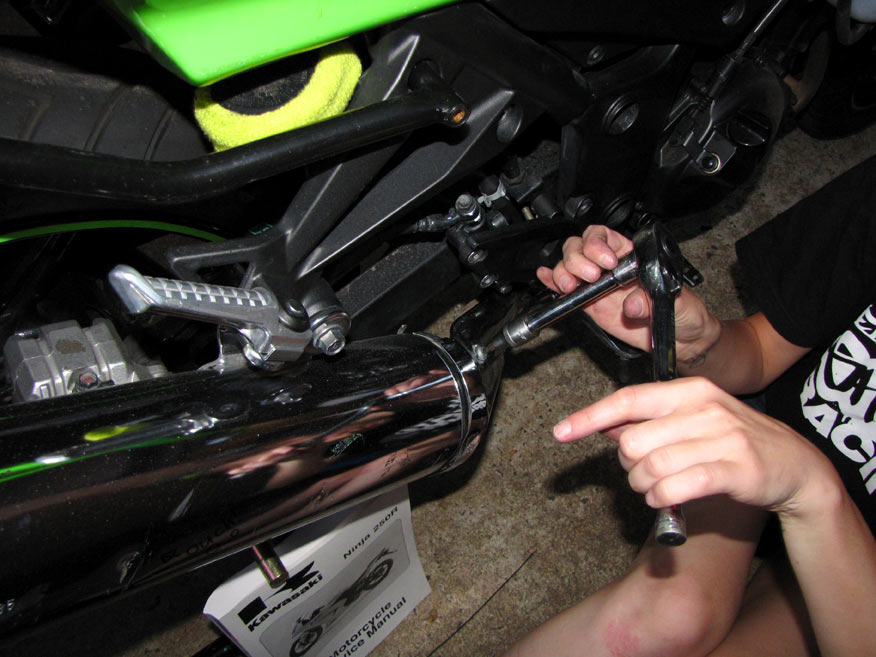
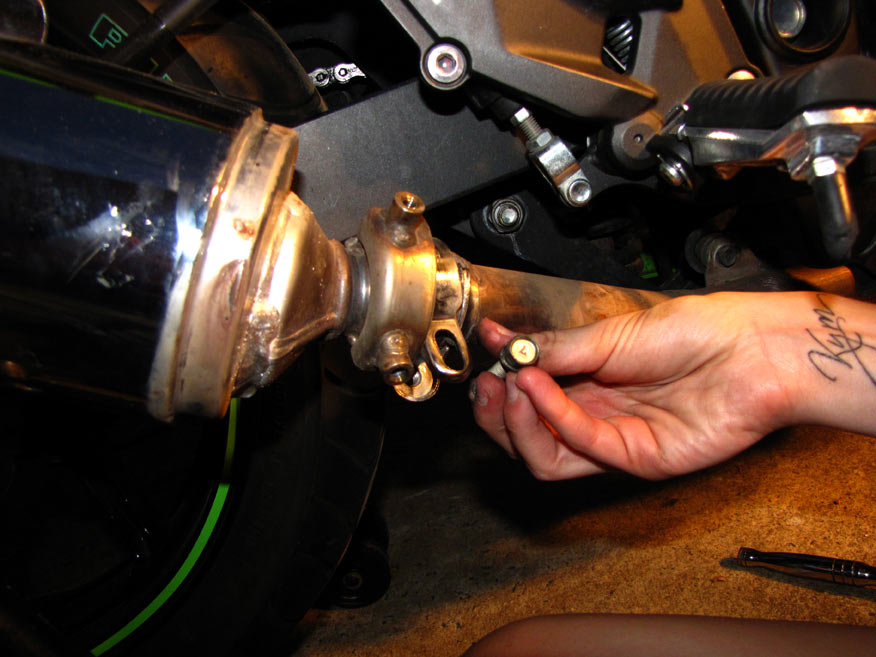
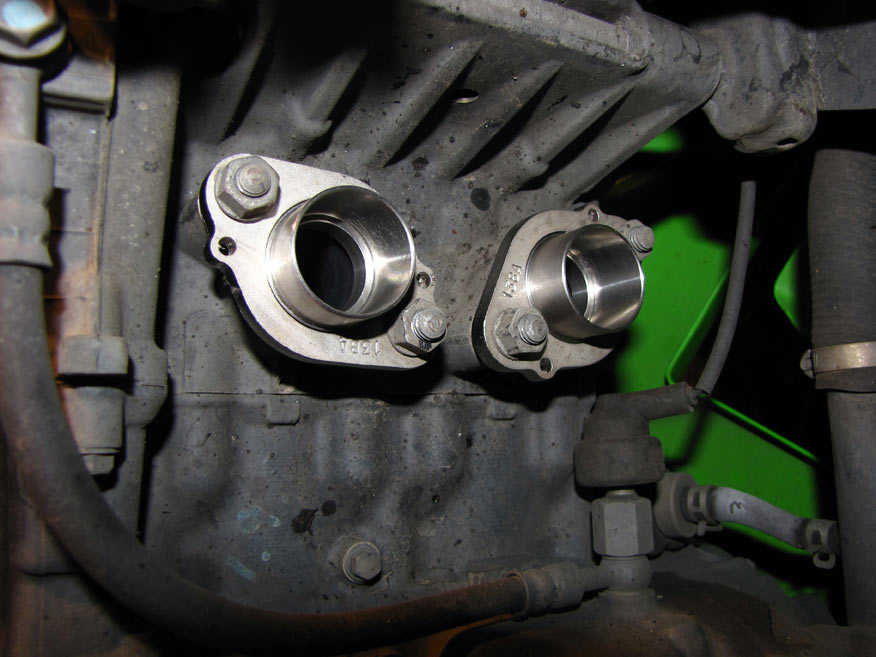
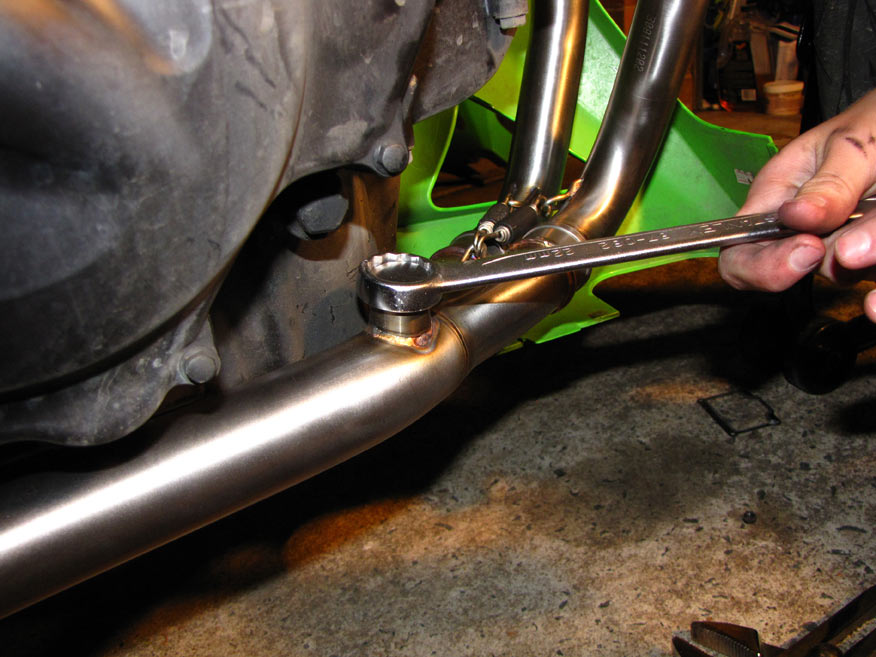
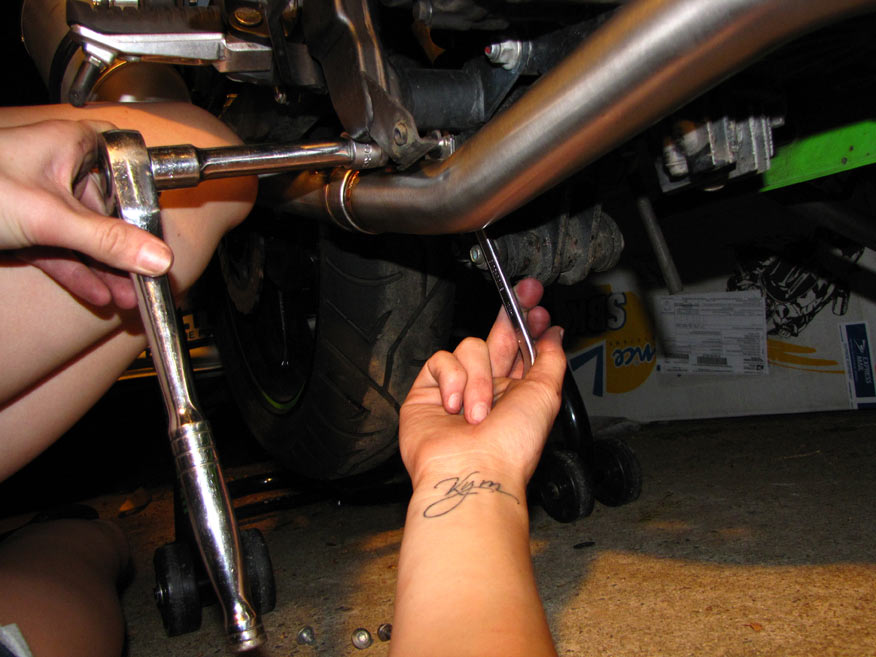
2 nuts per exhaust flange - 10mm socket in use...
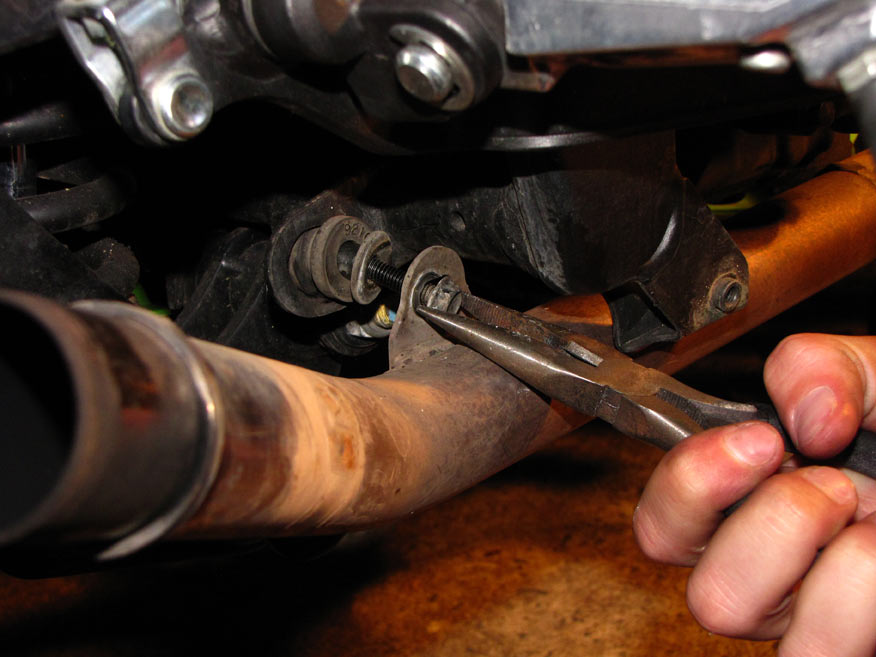
Headers also held on with a bolt in the hanger at back of motor
With nuts and bolt undone, headers slide forward to remove them from the motor.
This could easily be done by hand one undone, but i used the trusty parrot Grips only because we thought it would be funny to terrorise the Weirdo lady next door with no exhaust on... hehehe
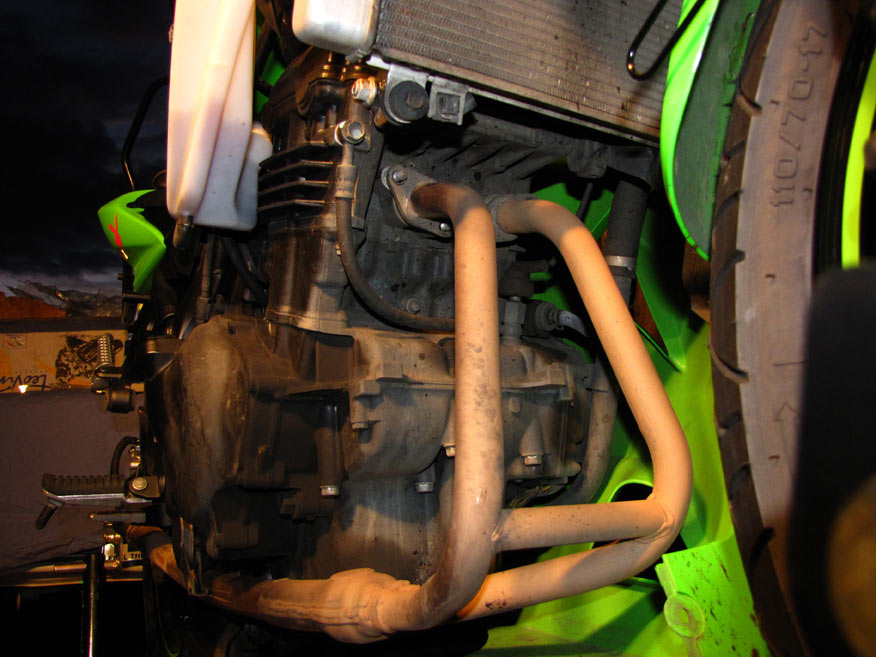
Headers removed
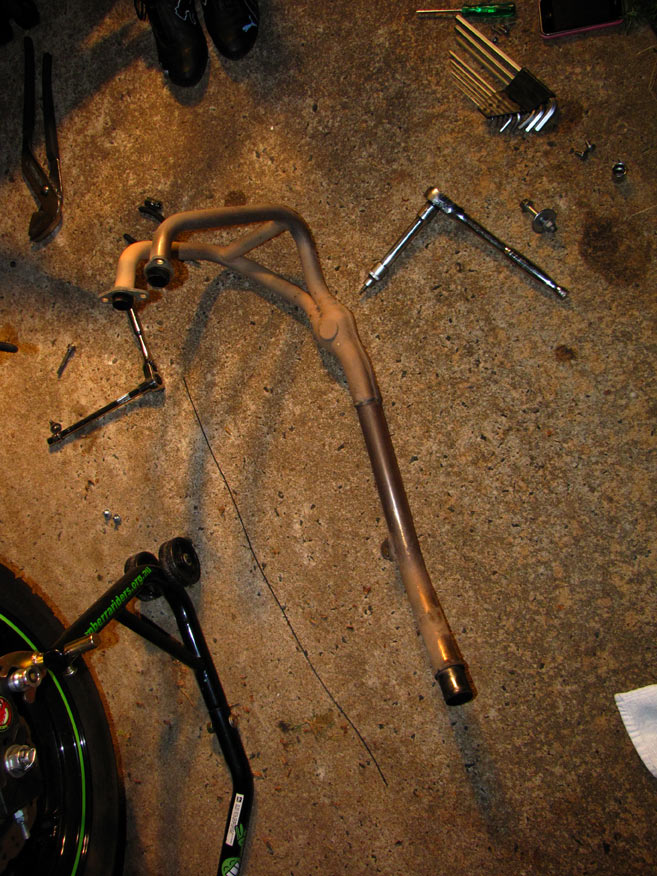
Test fitting of header pipes to collector. Best idea I've ever had. Test fitting every part means you can twist and jiggle pieces if they don't quite fi
Part 2...
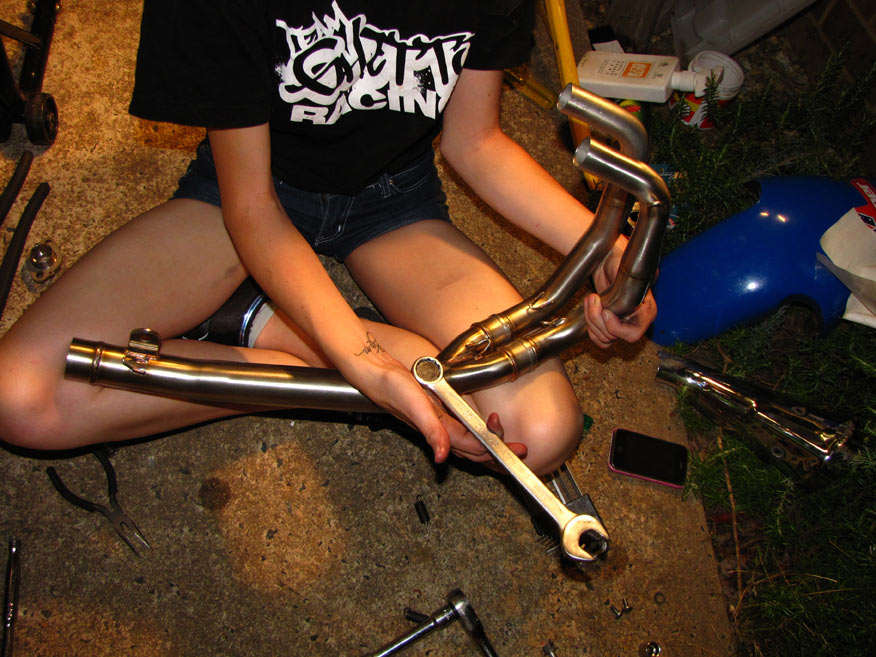
Bolt up exhaust flanges - Tight enough to hold them, but not so tight theres ZERO play in them. If you look closely you can see inside the exhaust ports!
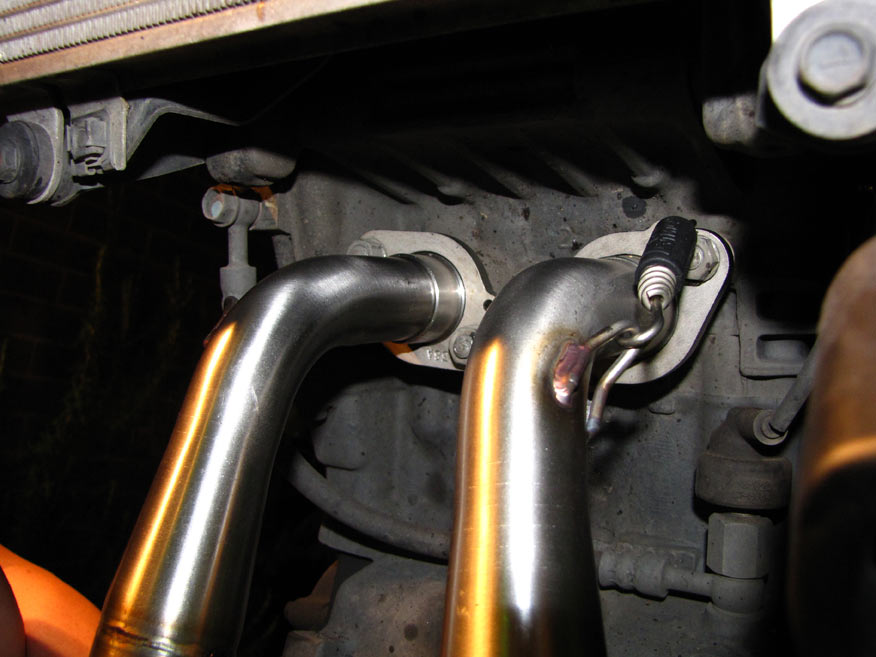
Use springs to hold header pipes to exhaust flanges. This is a bitch of a job. If you have skinny weedy arms like i do, I'd suggest maybe phoning a friend to give you a hand!
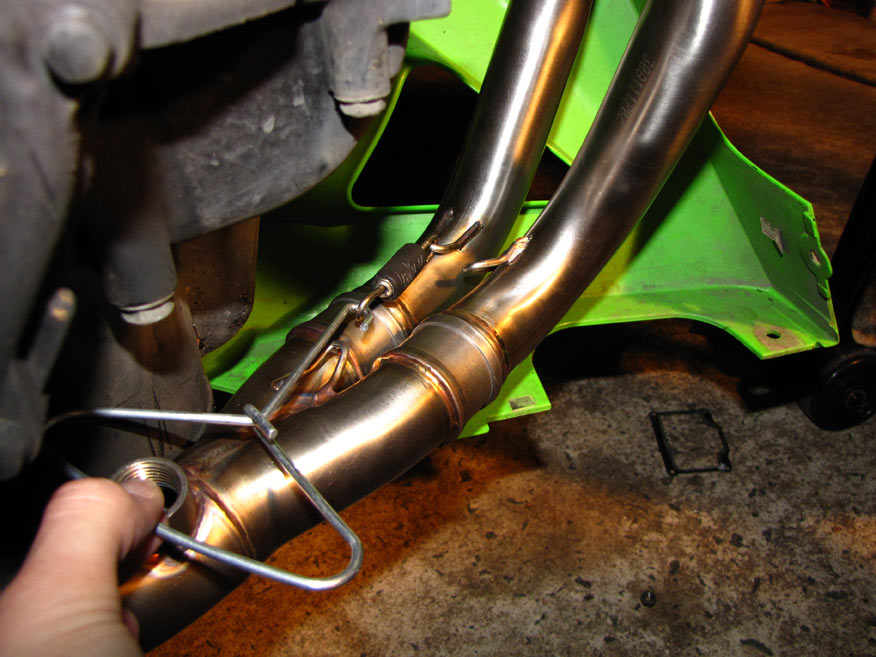
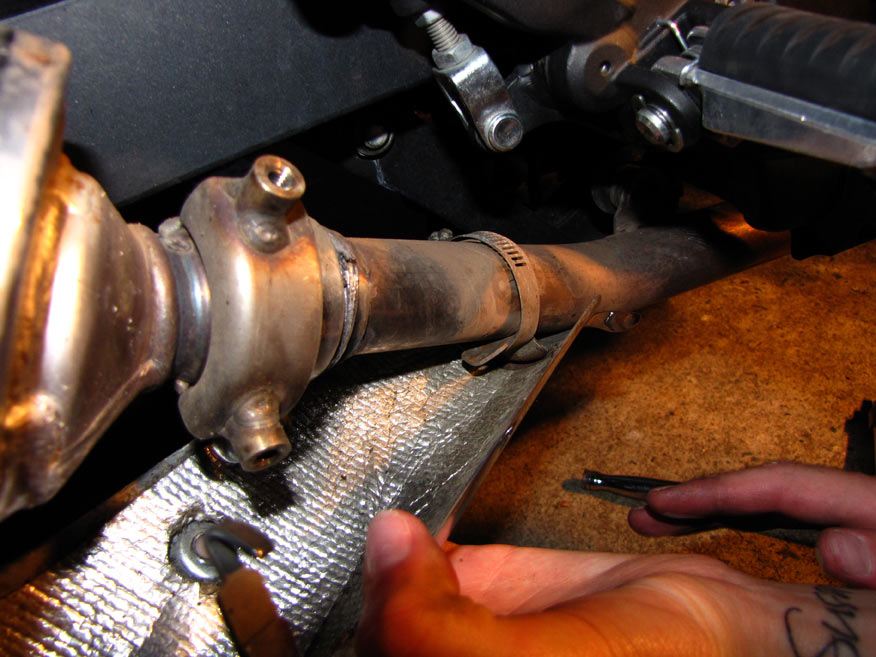
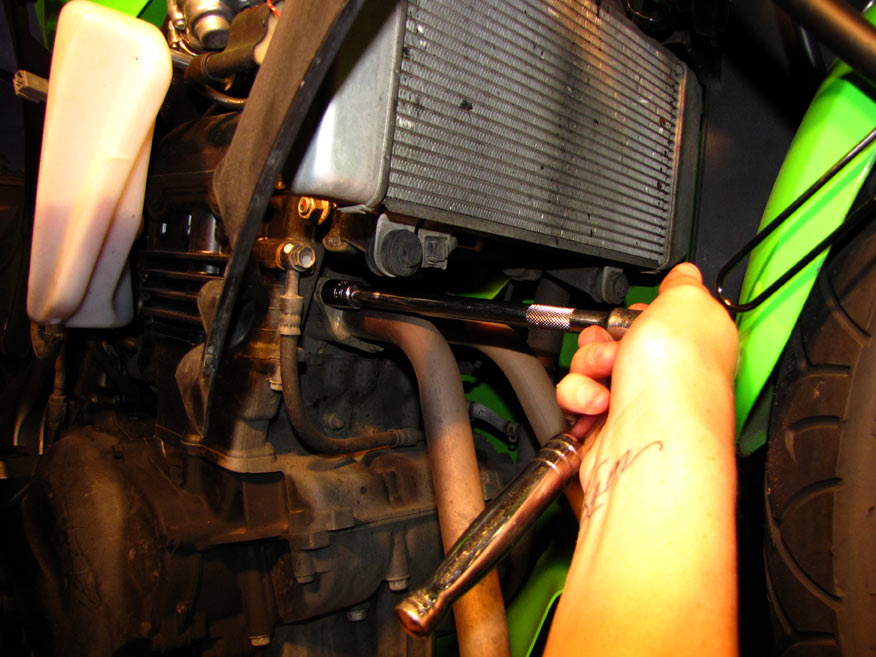
Springs also hold headers to collector. O2 sensor bung bolt needs to be removed to enable springs to be pulled on. Trust me. Do this up last!
Loosely bolt up end of collector pipe.
O2 sensor bung needs to be put in tight - 18mm socket works great!
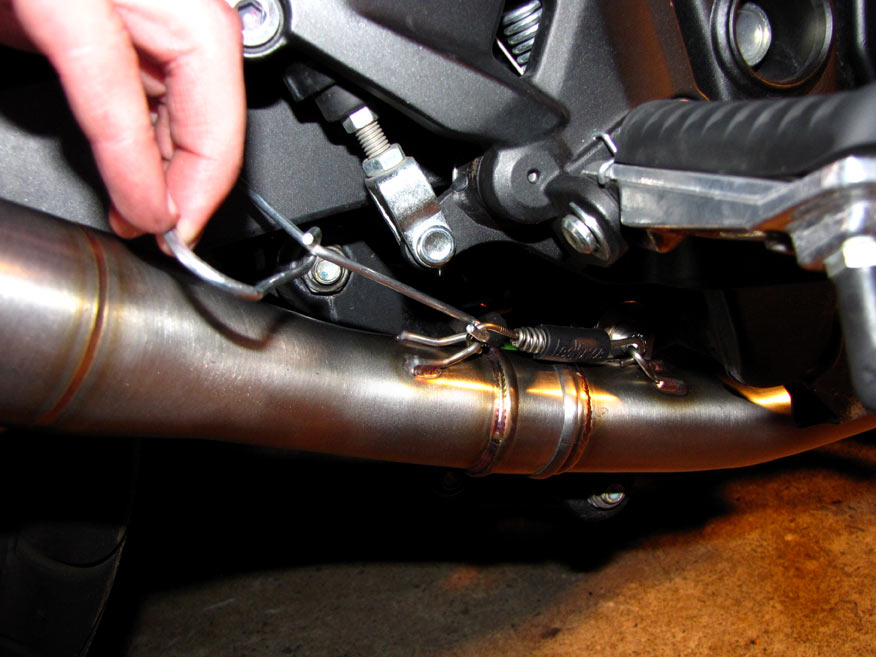
Spring to clamp muffler link pipe to collector pipe.
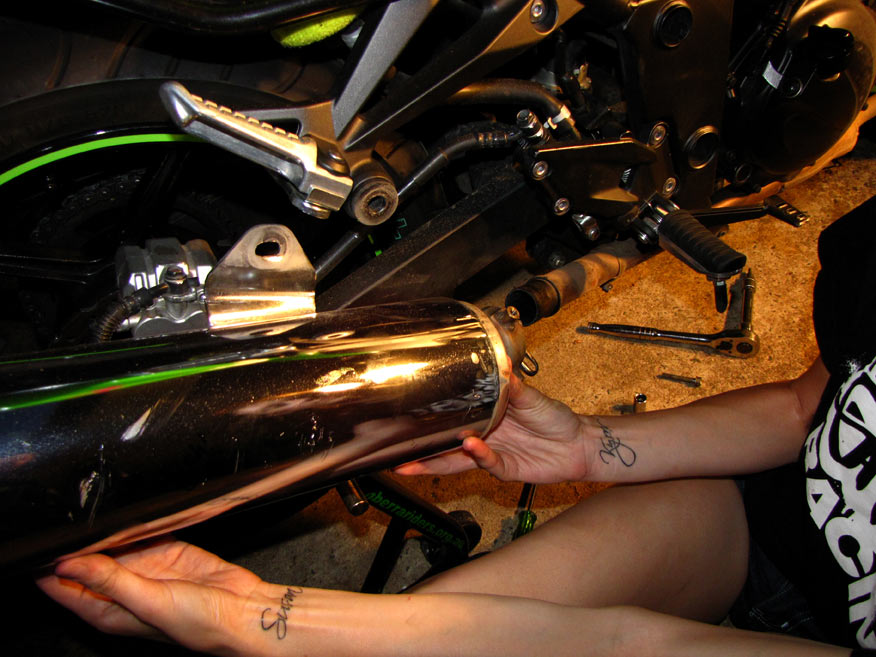
Ready for muffler.
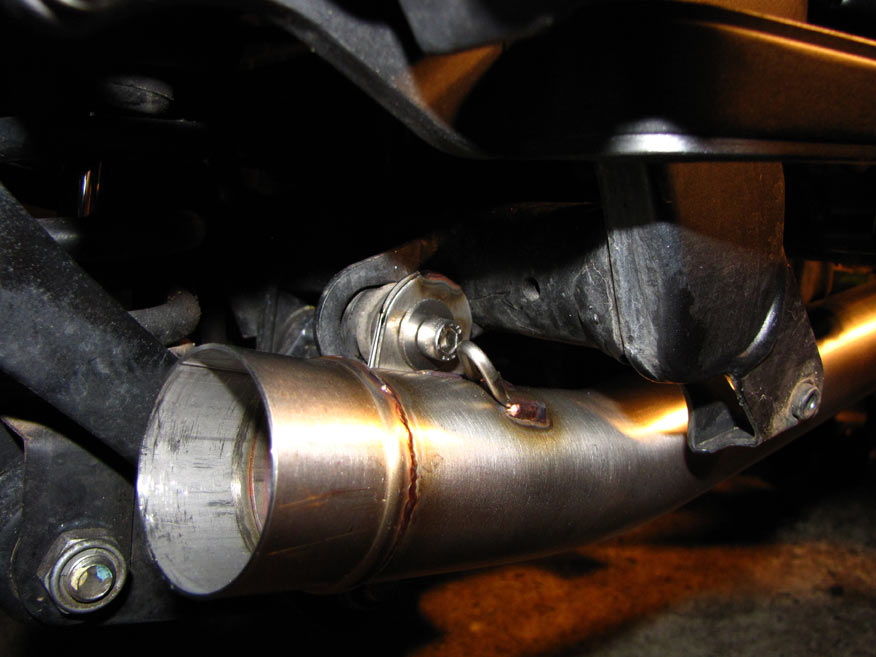
Muffler slips on link pipe and is held to bike with clamp. Note there is a spacer used between clamp and muffler hanger. Bit of a fight to get the long-ass bolt in, bit again, jiggle it til it fits and slide the can on as far as it'll go - this helps ALOT!
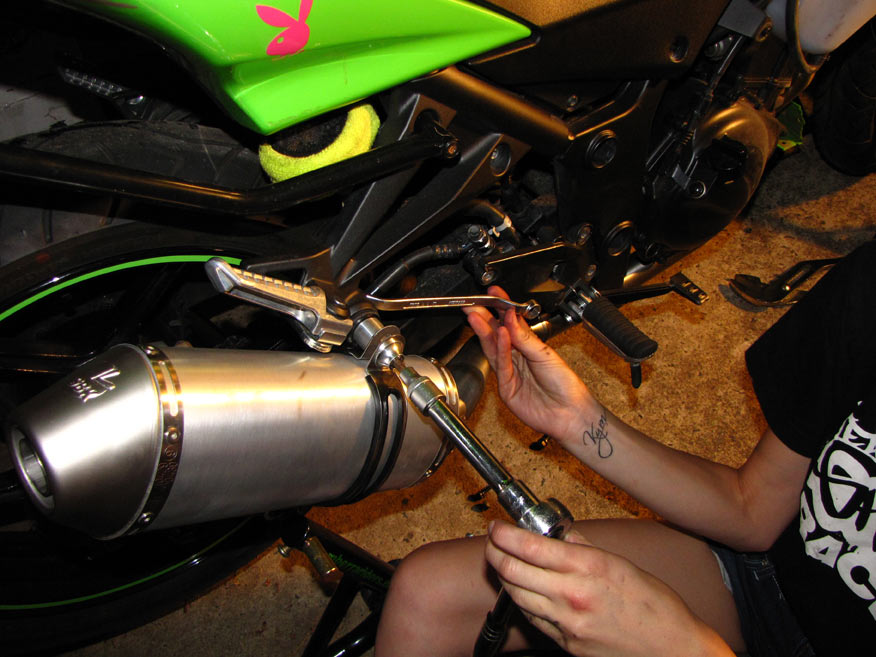
Working backwards from the muffler, tighten up all bolts to super tight.
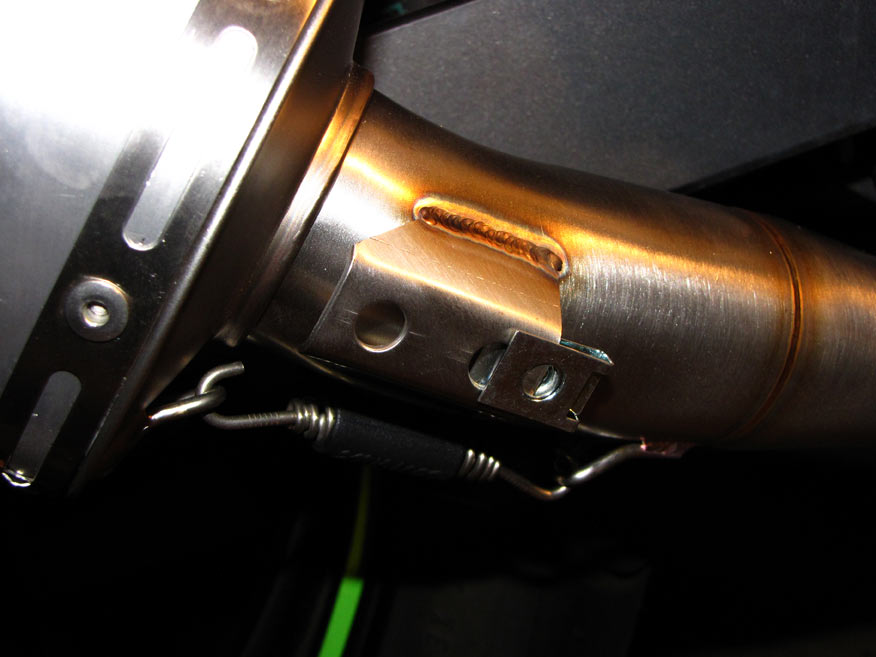
Speed nuts go onto muffler link pipe to retain the heat shield.
Heat shield screws on; it has heatproof cushioning washers to stop it rattling
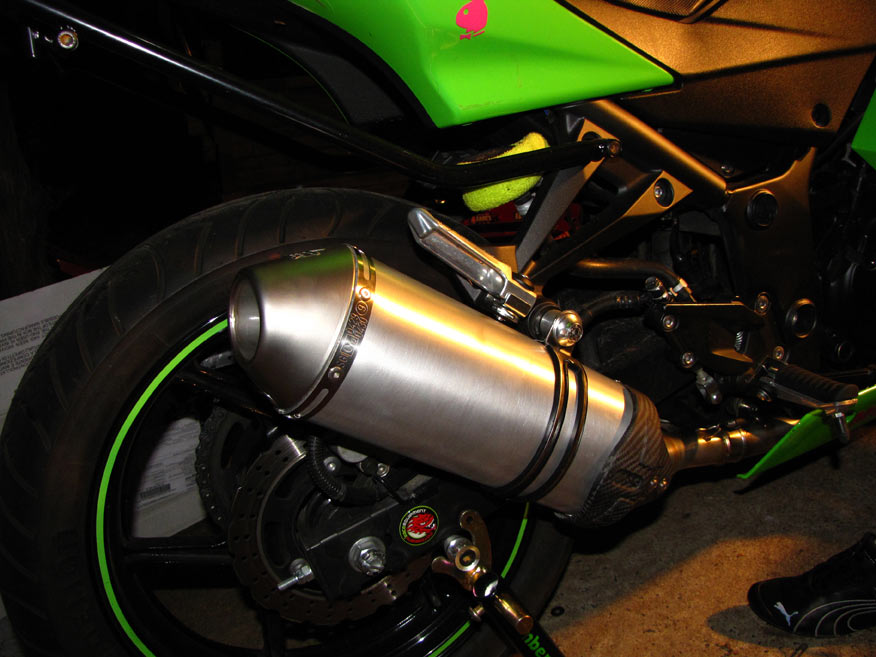
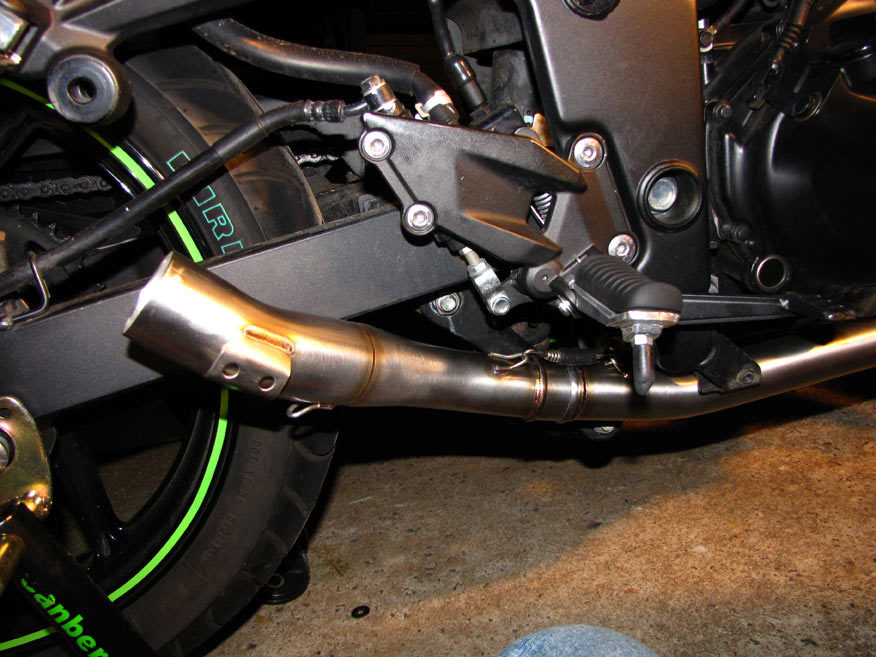
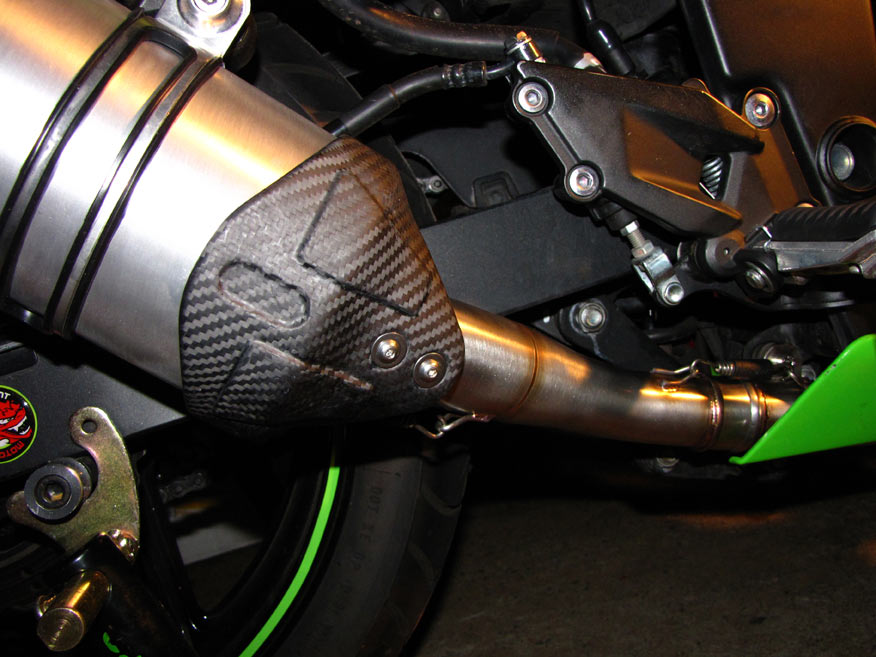
All fitted!
Total time taken:
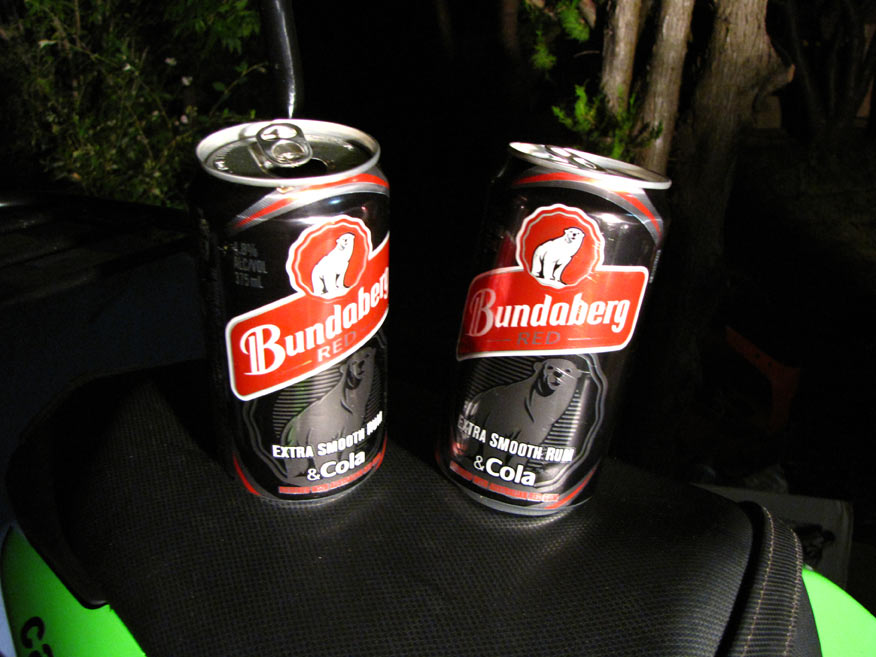
...two cans.
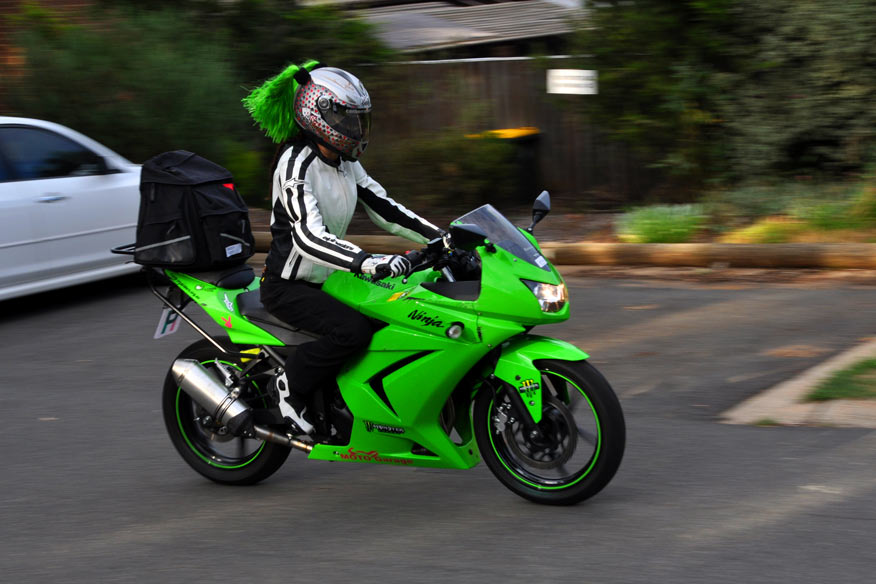
In action this morning
Sounds beaut! You can now tell it's on!! Loud Pipes Save lives, and they'll make that Volvo driver think twice about merging on top of me!!
I couldnt help myself and when it arrived I opened the box for a peek - HOLY MOLY there was some bits an pieces in there!!
BEFORE shot, Ninja 250r Workshop manual. Not required but can be useful
Buzz and a sunset lol
Preparations begin...
A crucial part of any aftermarket instalation session. Aerogard !
Supplied parts
[FONT=Calibri]1. Muffler (race baffle is installed in it when it is delivered) [/FONT]
[FONT=Calibri]2. [/FONT][FONT=Calibri]Road baffle [/FONT]
[FONT=Calibri]3. Spring puller [/FONT]
[FONT=Calibri]4. Assorted nuts and bolts [/FONT]
[FONT=Calibri]5. Springs to hold everything together [/FONT]
[FONT=Calibri]6. Collector pipe [/FONT]
[FONT=Calibri]7. Header pipes [/FONT]
[FONT=Calibri]8[/FONT][FONT=Calibri]. Exhaust flanges [/FONT]
[FONT=Calibri]9. Heat shield [/FONT]
[FONT=Calibri]10. Collector to muffler link pipe [/FONT]
[FONT=Calibri]11. Exhaust hanger strap [/FONT]
[FONT=Calibri]12. Worlds most useless instructions[/FONT]
Undoing fairings. There are bolts and plastic rivets and screws that need to be undone.
Indicators also have to come off - Pretty simple, just make sure you dont lose the tiny screw.
Radiator shroud screw - Dont forget this one!!
Lifting off the fairing. Becareful and make sure you unclip the indicator wiring.
If you try to pull the fairing away too hard, You'll pull the wiring out and or fk it up
Fairing removed. Bit dirty, might do a bit of a clean while I've got it off.
Removing standard heat shroud. 2 x 5mm allen key bolts
Heat shroud is also retained by a hose clamp which has to be loosened. Just a simple phillips head screwdriver does the trick. You have to loosen it enough the Shroud pretty much falls in your lap.
Remove bolt on muffler clamp
Remove bolt on muffler hanger
Muffler slides off! Simple!
2 nuts per exhaust flange - 10mm socket in use...
Headers also held on with a bolt in the hanger at back of motor
With nuts and bolt undone, headers slide forward to remove them from the motor.
This could easily be done by hand one undone, but i used the trusty parrot Grips only because we thought it would be funny to terrorise the Weirdo lady next door with no exhaust on... hehehe
Headers removed
Test fitting of header pipes to collector. Best idea I've ever had. Test fitting every part means you can twist and jiggle pieces if they don't quite fi
Part 2...
Bolt up exhaust flanges - Tight enough to hold them, but not so tight theres ZERO play in them. If you look closely you can see inside the exhaust ports!
Use springs to hold header pipes to exhaust flanges. This is a bitch of a job. If you have skinny weedy arms like i do, I'd suggest maybe phoning a friend to give you a hand!
Springs also hold headers to collector. O2 sensor bung bolt needs to be removed to enable springs to be pulled on. Trust me. Do this up last!
Loosely bolt up end of collector pipe.
O2 sensor bung needs to be put in tight - 18mm socket works great!
Spring to clamp muffler link pipe to collector pipe.
Ready for muffler.
Muffler slips on link pipe and is held to bike with clamp. Note there is a spacer used between clamp and muffler hanger. Bit of a fight to get the long-ass bolt in, bit again, jiggle it til it fits and slide the can on as far as it'll go - this helps ALOT!
Working backwards from the muffler, tighten up all bolts to super tight.
Speed nuts go onto muffler link pipe to retain the heat shield.
Heat shield screws on; it has heatproof cushioning washers to stop it rattling
All fitted!
Total time taken:
...two cans.
In action this morning
Sounds beaut! You can now tell it's on!! Loud Pipes Save lives, and they'll make that Volvo driver think twice about merging on top of me!!
Pink on the outside, but still green on the inside!
-
robracer
- VIP MEMBER
- Posts: 15251
- Joined: Thu Feb 24, 2005 8:23 pm
- Bike: ZX6R
- State: New South Wales
- Location: Port Macquarie
Re: Project Buzz: 09 Ninja 250r
Awesome Post Stacey & great looking pipe 
Wonder where I can get a Ghetto shirt from
Wonder where I can get a Ghetto shirt from
-
MIZ RX3
- KSRC Regular
- Posts: 500
- Joined: Mon Aug 24, 2009 1:38 pm
- Bike: Ninja 250
- State: ACT
- Location: Canberra ACT
Re: Project Buzz: 09 Ninja 250r
LOL Rob. That reminds me, i have a cotton Romper for a friends baby that needs some TGR Font love! hahahaha
Pink on the outside, but still green on the inside!
-
robracer
- VIP MEMBER
- Posts: 15251
- Joined: Thu Feb 24, 2005 8:23 pm
- Bike: ZX6R
- State: New South Wales
- Location: Port Macquarie
Re: Project Buzz: 09 Ninja 250r
Send it for the next run..... soon I hearMIZ RX3 wrote:LOL Rob. That reminds me, i have a cotton Romper for a friends baby that needs some TGR Font love! hahahaha
-
Stace

- Team Bolt

- Posts: 3193
- Joined: Tue Oct 19, 2004 9:47 am
- Bike: ZX9R
- State: Victoria
- Location: Oakleigh,Victoria. Team BOLT Racing Headquarters
- Contact:
Re: Project Buzz: 09 Ninja 250r
Awesome Job Stace # 2. Next time your in Vic let me know, I'll leave the shed key out and a list of things to be done to the RS.
I have to admit though, I am a little concerned that all that work was done and only two cans were consumed, I think you may need to work on that side of your work shop skills. Takes me 2 cans to walk to the shed let alone do anything
I have to admit though, I am a little concerned that all that work was done and only two cans were consumed, I think you may need to work on that side of your work shop skills. Takes me 2 cans to walk to the shed let alone do anything
FASTER AND FASTER Until the Thrill of Speed Over Powers the Fear of Death

-
MIZ RX3
- KSRC Regular
- Posts: 500
- Joined: Mon Aug 24, 2009 1:38 pm
- Bike: Ninja 250
- State: ACT
- Location: Canberra ACT
Re: Project Buzz: 09 Ninja 250r
LOL i dun think sooooo!Stace wrote:Awesome Job Stace # 2. Next time your in Vic let me know, I'll leave the shed key out and a list of things to be done to the RS.
I have to admit though, I am a little concerned that all that work was done and only two cans were consumed, I think you may need to work on that side of your work shop skills. Takes me 2 cans to walk to the shed let alone do anything
Next up this sunday, whilst recovering from a mega hangover, I'll be installing the heated grips in preparation for shitty winter
Pink on the outside, but still green on the inside!
-
Torquewrench
- KSRC Member

- Posts: 309
- Joined: Mon Mar 09, 2009 4:03 pm
- Bike: ZX10R
- State: South Australia
Re: Project Buzz: 09 Ninja 250r
Great job. Well done looks great.
-
Jonno

- Mobile Chicane
- Posts: 5613
- Joined: Thu Dec 30, 2004 4:10 pm
- Bike: Other Kawi
- State: Queensland
- Location: Brisbane
- Contact:
Re: Project Buzz: 09 Ninja 250r
Great stuff, good post to encourage others to have a go themselves
-
Striker82

- Newbie
- Posts: 1
- Joined: Mon Jan 31, 2011 11:12 am
- Bike: Ninja 250
- State: Queensland
- Location: Brisbane
Re: Project Buzz: 09 Ninja 250r
Hey guys and girls love the mods on the Ninja Im a newbie here so just feeling my way around
-
mikeman
- Warming up

- Posts: 51
- Joined: Sat Jan 22, 2011 11:34 pm
- Bike: Ninja 250
- State: Please Select a State
Re: Project Buzz: 09 Ninja 250r
Awesome pics! Those mods are fantastic looking too and the white gear with the black helmet looks really good!
Quick question guys and gals. What's the black headlight cover in the pic of the green Ninja on page 2? And where can I grab one from?
Are they illegal btw?
Quick question guys and gals. What's the black headlight cover in the pic of the green Ninja on page 2? And where can I grab one from?
Are they illegal btw?
Needs more CCs between his legs.