by MadKaw » Sun Feb 05, 2006 8:47 am
Yep, The KLEEN system is the crap between the head and the air box.
It injects clean air into the exhaust to reduce emissions. Its easy to remove and you can either buy block off plates for the rocker cover or route the hoses into each other.
I seriously don't believe it has any major effect on HP and as far getting 20hp from this a slip on, filter and some tuning, I don't think so either.
I wouldn't recommend a BMC race filter for the street, they are very open mesh.
They'd need to be running some big fans so the ram air came into effect.
10 tenths, who did the dyno on this, are quite a reputable tuner in Sydney so it is a bit odd..
Heres something on the factory pro site.
Hey Marc,
Here is my findings on the pre-production kit, #CRB-K88-1.7-RK. Feel free to post for others to use.
First off the bike was a 00' California model.
Second, this kit WORKED!
We used our (dxxxxxt) dyno for before and after dyno runs.
All Stock as delivered from Jim Gilbert of Ashland, Oregon with 1,390 miles.
Peak hp was 131.6 dynojet hp The bike is fairly "flat" from @8,500~11,500. Resembles a table almost. Customer complained about terrible "lean surge" at cruising and low speeds when he brought it in.
We then proceeded to remove the stock exhaust and install a new Akropovic full system. Complete stainless steel with a carbon fiber canister (20") installed.
Emissions:
First off we removed ALL emission related items; hoses, vent lines, canisters, etc. After that we moved on to removing the carbs, fairly simple, just be sure to take time in removing throttle cables. (place clean rag over manifolds!)
The next step was to "by pass" the "exhaust air injection system" This is very straight forward. Simply remove the main hose that comes from the airbox on the right side and goes to the middle of the valve cover (@7" long and 1" dia.) remove the actual "valve" that connects the previously mentioned hose to two smaller hoses that connect to the valve cover.
Next plug off the vacuum line that is connected to the "valve" and the #3 intake manifold. (we simply remove it and place a vacuum cap over the #3 intake manifold nipple. finally we install a @4" piece of 1/2" pipe between the two hoses that are still connected to the valve cover (and used to have the other ends into the "valve") that way the entire system is bypassed. Failure to do this WILL cause backfire upon deceleration!!
(note: This is a CA bike, but is located in Oregon. It is illegal to tamper with emissions equipment in CA vehicle registered in CA. Marc)
Now onto the carbs.
First off we removed the float bowls on each carb. Then we replaced each pilot jet (stock #38) with the
provided #40. We then moved onto the emulsion tubes and the main jet (the bigger round one, in center of carb!) We simply removed the stock emulsion tube with the main jets still installed in them from the carbs. You must then "separate" the stock emulsion tube from it's OEM "holder", this is very easy just take two 8mm box wrenches. Then install the #emu-188k factory emulsion tubes into the OEM "holder" and reinstall into carb body. BE SURE NOT TO OVER TIGHTEN the tube.
Next we installed the main jets into our new emulsion tubes. The stock mains were 165 on the outside and 170 inside.
We installed 175in and 178out for a starting point. We then checked the float height. Simply "rotate" the carbs until the floats "hang" free and move freely. Then "roll" the carbs back the other way until the "settle" . DO NOT COMPRESS THE FLOAT VALVE PLUNGER!!! We found this to be right at 4mm as delivered and left this at it current setting. We finally replaced the bowls with the new (and much better) allen screws provided in the kit.
Next, you must remove the Fuel Mixture Screw plugs.
Simply place the carbs so that you are looking straight down on the bottom of carbs and look for round brass cap (@10mm dia.) and remove with a appropriately sized drill bit. BE CAREFUL!! DO NOT drill too far! You WILL hit the screw head and mess it up. Take your time. Be sure to clean the carbs off very well
after this. We then turned in each fuel mixture screw until it seats (NOT TOO HARD!)
The stock settings were all over the place from +0x to +2.5x. We set #1 and #4 at +1.25turns out and #2,#3 at +1.5 turns out. This later gave us a CO% reading of 3.5% at idle when bike was fully warmed up.
Next, we moved onto the needles. Once the carb tops were removed the needle retention cap needs to be removed. This is very
simple, just "squeeze" the cap at the arrows and lift up. We removed the stock non-adjustable needles and installed the
#0969j-83o-40v5_2.9bt needles included. The needle clips were placed at the /2 position (from the top) with the stock metal
"shim" RETAINED! Then reverse the order to reinstall the needle, slides and caps. NOTE: if the rubber slide diaphragm does
not want to "stay" in it's groove, try some grease (like Silkolene PRO RG, Dielectric grease or such) in the groove and that should hold it in place while you install the slide top.
Finally we removed the airbox adapter plate on the back side of the carbs in order to modify the main air jets. When
looking into the back of the carbs you will notice two "jets" you want to drill the MIDDLE ONE!!! Do NOT touch the other.
We used a "PIN VISE" to drill out the main air jets. (A pin vise is a small hand held "drill" that you can purchase from a
hobby shop for about $9.) TAKE YOUR TIME!! The drill bits are FRAGILE. We enlarged the #1 and #4 M.A.J. to 1.1mm with the BLACK coated drill bit. Then we enlarged the #2,3 M.A.J.'s to 1.2mm with the SILVER coated drill bit.
We then, after making VERY sure the entire carbs were clean, reinstalled then in reverse order of disassembly. Once
installed we warmed the bike up to operating temp and shut off. We then installed a set of mercury carbs sticks and refired
the bike to "synch" the carbs. NOTE: Please do NOT skip this part, carb synch is VERY important for smooth running! And do
not synch until bike is up to operating temp.
After a few moments to warm up we ran a few baseline runs and then "pulled the trigger"
YEEE HAAA! What do you know.... 144.7hp! A HUGE 13+hp gain. Not too bad. More importantly the bike's dyno graph was
actually SMOOTHER than before by A LOT. The bike now peaked at @10,200 and held most of it with in 4% of peak hp at
redline! VERY NICE.
Lastly the moment of truth. A call from Jim on Sunday.
He said that he has NEVER in 13years of riding had a bike run so smoothly and cleanly.
The bike warms right up, runs perfectly and has no glitches at any rpm or throttle position!
Thanks again for letting me help your forever ongoing development of the BEST carburetion recalibration kits available. We at EDR PERFORMANCE will continue to run nothing but FACTORY TUNING products in all our race and street bike. Thanks again,
Eric Dorn, owner
EDR PERFORMANCE
5968 S.E. Alexander Street Unit F
Hillsboro, OR 97123
503-259-2891
Dave
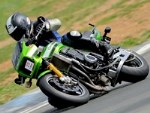
2010 Z1000
ex bikes
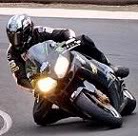
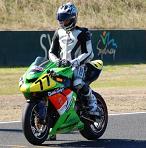
05 ZX-10R Race Bike - No.77
95 ZXR750R M Race Bike - No. 75
98 ZX9R Race Bike - No. 000
zx6r, zx7r, GPX750, GPX500, lots of KX's.

I ride way too fast to worry about cholesterol