OMFG........with almost 50k on board, and a run on the dyno tomorrow, it was time to bung in some new iridium plugs.....
I couldn't find a guide here, there is some bits and pieces around the 'net- but nothing really definitive.......so here are some tips on how to do this job yourself...... its bit of rooting around, but by and large, not that difficult really, despite the horror stories out there...
First thing - you *must* have the special plug spanner that comes with the OEM toolkit. If you don't have this, forget about using any sort of normal plug-spanner......The OEM plug-spanner pivots in the middle, and locks in the vertical position - it has to, to get into the tight space between top of the head and underside of the frame....a 14mm socket then fits over the top of the plug spanner, and you can use a normal ratchet to tighten/loosen the plugs...
Both the lower fairing sections on each side need to be removed. As does the small inner panels that fit between fairing and tank.
On the r/h side - remove the throttle cable plate which bolts onto the end of the throttle body housing. Once this has been unbolted, you can move the throttle cables and choke cable out of the way, to give you some more swinging room under the frame - and you need as much as you can get, its tight under there !! On the l/h side, there is a bit more clearance, but undo the coolant tank and just let it hang out the way while you do #1 and #2 plugs...
There is a rubber flap covering the top of the head on each side - just move it out of the way by folding it up and away from the top of the stick-coils....towards the middle regardless of which side you are doing.
Once the rubber cover is moved, you will see a plastic cover between the coils - use a 10mm spanner to remove the bolt which holds this down. This cover does not actually come out, but you need to be able to move it out of the way during the process....
The electrical plug on the back of each stick-coil needs to removed. Use a small flat-blade screwdriver to hold down the 'clip' on top of each plug, at the back, while you push the plug towards the rear - it should then unclip fairly easily.
This leaves the top of the stick-coil just sitting there........it *will not* move out of the head with finger pressure alone. Use the spray-extender on a can of WD40, and spray a bit of wizards piss around the coil, where it sits into the head. You will be able to grab the end of the coil with your fingers, spin it around a bit. This will help it come out. What you need to do is use a long screwdriver, and gently lever underneath the plug-extension on the back of the coil , while you move the coil around with your fingers. Doing this will see the coil-stick pop up and out of the head fairly easily.
Lift the coil-stick out of the head. It needs to bend a bit to clear the underside of the frame, but it is rubber at the end and it will come out with some encouragement .
Once the coil-stick is out, feed the plug spanner into the hole. You need to use the 90-deg bend to get it in. It will drop down all the way, until only the end is protruding out of the head by about 10mm - enough to get 14mm socket on the end, and just ratchet the plug out. You will have to take the ratchet off once the plug is loose, as there is not enough clearance to ratchet it right up and out.....just undo the plug a few turns, take the ratchet off, and use your fingers to turn the socket. This is much easier than it sounds....
Installation is the reverse .....
Use a bit of WD40 on the plug thread. The OEM spanner has a rubber fitting up the inside, which grips the end of the plug well - just feed the plug into the hole, until you can fell the plug hit the bottom. Once again, just use your fingers to start the plug into the thread, screw it in while it remains finger-tight only, then use the ratchet to tighten the plug up properly. Each stick-coil is then replaced, and the plug connector plugged back into place. Replace the bolt which holds the plastic cover in, and the move the rubber cover back into position. Replace the throttle plate fitting on the r/h side, and the coolant tank on the left, then the fairing panels.......
and thats it.
Sounds pretty complex, but its actually not as bad as I was lead to believe. A lot more time-consuming than changing the plugs on the Black Pearl, which takes about 5 minutes start to finish !
I used NGK CR9EIX plugs, these are what was fitted at the 10k service, in 2006
Barge owners everywhere - knock yourselves out !
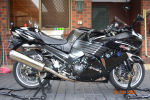
(for those who may not know what the MFP12 is - its a 2005 model ZX12R.)


")

