Re: Project Buzz: 09 Ninja 250r
Thu Feb 03, 2011 11:48 am
mikeman wrote:Awesome pics! Those mods are fantastic looking too and the white gear with the black helmet looks really good!
Quick question guys and gals. What's the black headlight cover in the pic of the green Ninja on page 2? And where can I grab one from?
Are they illegal btw?
Its just black tape over the top of the light to protect it while out on the track.
Re: Project Buzz: 09 Ninja 250r
Thu Feb 03, 2011 12:44 pm
Ahhhhh. I thought it was a removable cover of some sort. I saw some on eBay but wasn't sure which one was good. And if it's legal to have them on.
Re: Project Buzz: 09 Ninja 250r
Fri Feb 04, 2011 9:14 am
Whickle wrote:mikeman wrote:Awesome pics! Those mods are fantastic looking too and the white gear with the black helmet looks really good!
Quick question guys and gals. What's the black headlight cover in the pic of the green Ninja on page 2? And where can I grab one from?
Are they illegal btw?
Its just black tape over the top of the light to protect it while out on the track.
Yep, Whickle's right - Its just plain ol' black Duct tape for the track
You can get headlight covers that velcro dot to the headlight itself, but its only plastic and if you crash, its just going to make the same mess if you didnt have one on at all - if not more. If i stack with the tape and the headlight cracks, it'll stay together, instead of sprinkling the track with itty bitty shards of plastic
Re: Project Buzz: 09 Ninja 250r
Fri Feb 04, 2011 9:57 am
Hehe, see you guys do it for practical reasons. I just wanted to add a little extra touch of black to my bike... so purely for cosmetic reasons. 
I shall keep the duct tape trick in mind when taking the bike on the track. It's a great way to keep the track clean!
I shall keep the duct tape trick in mind when taking the bike on the track. It's a great way to keep the track clean!
Re: Project Buzz: 09 Ninja 250r
Fri Feb 04, 2011 3:01 pm
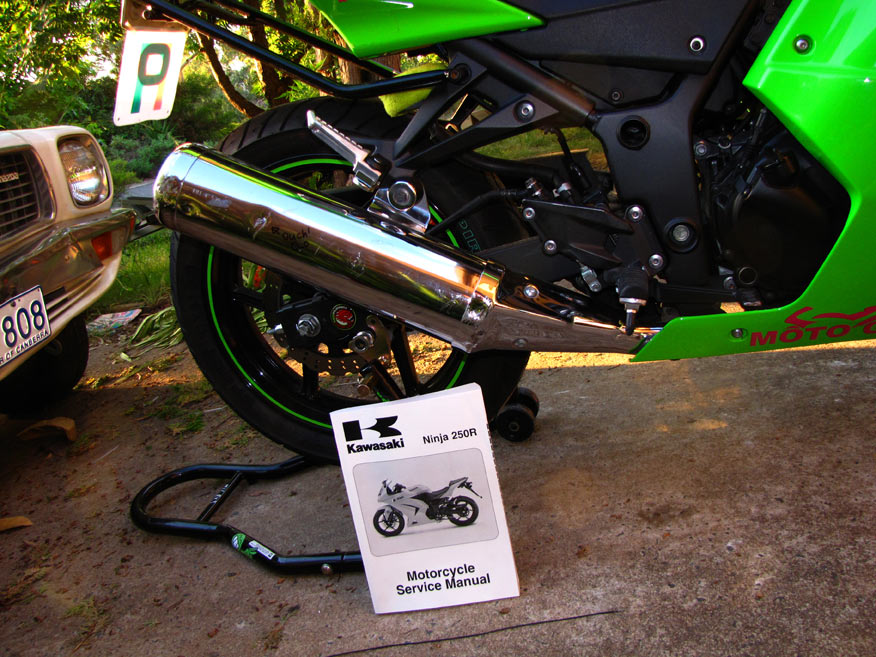
MIZ RX3 wrote:Well finally my early valentines day gift arrived - A Leo Vince Exhaust System! The BF spotted it at a VERY reduced price at CA Cycleworks and instead of flowers - its the perfect gift!
I couldnt help myself and when it arrived I opened the box for a peek - HOLY MOLY there was some bits an pieces in there!!
BEFORE shot, Ninja 250r Workshop manual. Not required but can be useful
The system looks good.Nice pressie.
Where did you get the workshop manual? Never knew they had one for the later mod ninjas.
Re: Project Buzz: 09 Ninja 250r
Wed Feb 16, 2011 12:05 pm
Kawasaki – Japanese for “we put your horn in such a place that it makes it impossible to put it on a headstem stand”. I swear – look it up! :p
After months of fking around having to take it off everytime I needed/wanted to put it up on stands we bought one of these:
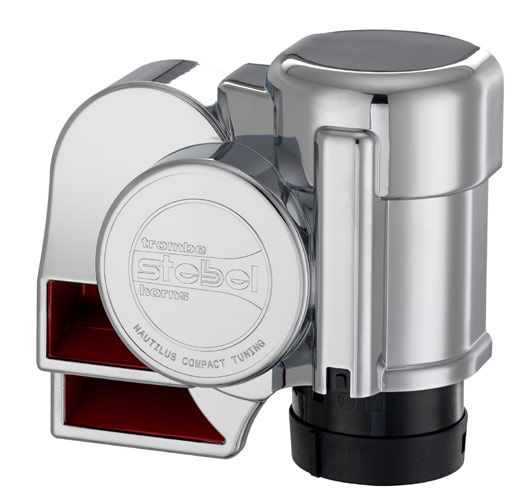
Hehehehehhehehe – Youtube/Google ‘Stebel compact nautilus horn’ it’s full of win!
When I first got my bike, my wonderful Mom (brownie points for mentioning her) bought me a Motorcycle GPS. It’s the same as your regular Navman or TomTom, except it’s waterproof, comes with a handlebar mount and the screen is able to be used whilst wearing gloves!
It had lived in the box since the day I got it, only ever pulling it out of the box to have a play. Nifty little thing it is, really voids the whole “I need a clear tank bag so I can put maps in it” thing. WIN!
Supamodel bought me a set of Oxford Heated grips months ago and it was one of those ”oh next weekend” jobs, that we never got around to.. So this weekend just passed it was time to install the GPS, the heated grips and the Stebel Compact Nautilus horn and tinker with the wiring to provide power (only when the bike is on) for my GPS.
The Plan - made entirely of win.
------------------------------------------------
The plan was to install two relays. One would provide switched power for the heated hand grips and the GPS. The other would work for the horn: Stebel horns pull so much more power than normal horns they need upgraded wiring & switching.
For those that don't know, relays take a signal of a low power (which can go through a switch), and bring in a high-power source (usually a BIG FAT lead from the battery). They are useful for devices that require more power than can go through switches.
I’m a complete numpty when it comes to this electrical gizmo stuff, but apparently its really simple and it helps to know a couple of techniques. So here's how I soldered wires to join them, and how to do crimp connectors. Some people love them, some people hate them... This is not the only way to do electrical stuff, just how I did it.
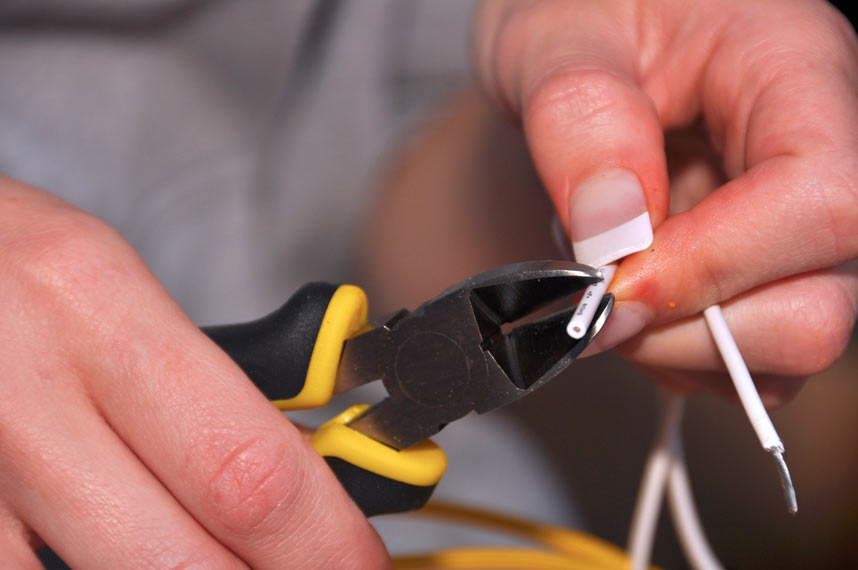
Stripping the ends of wires isn't hard, just use side cutters to cut through the insulation. Or your teeth (not recommended!)
Pull the end off and twist, to bring the wires together.
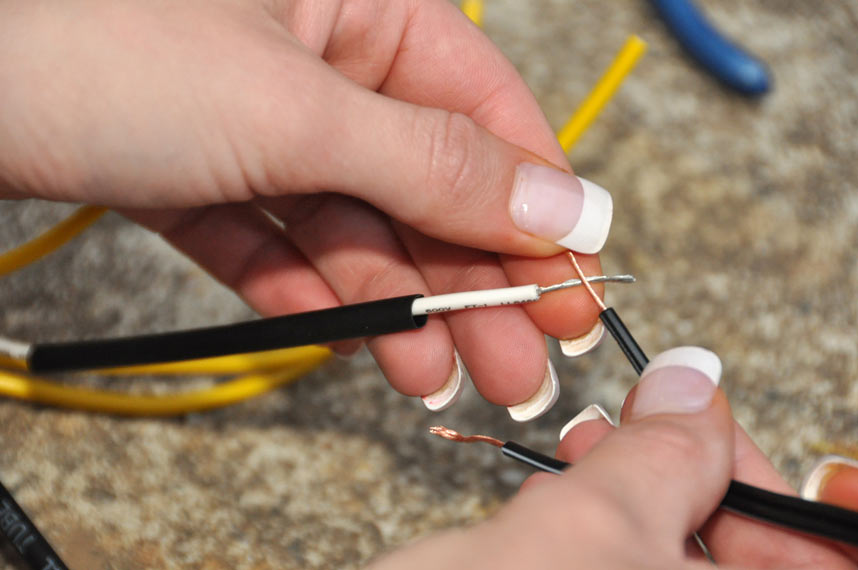
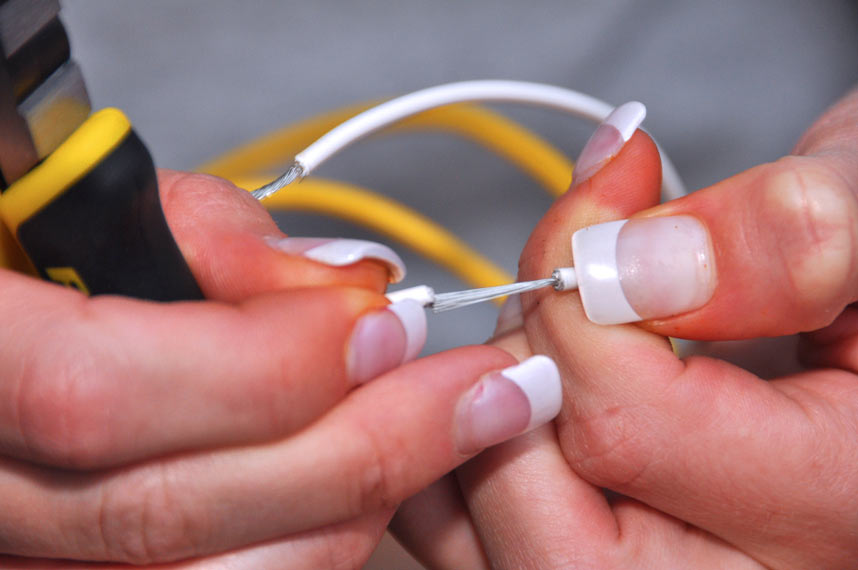
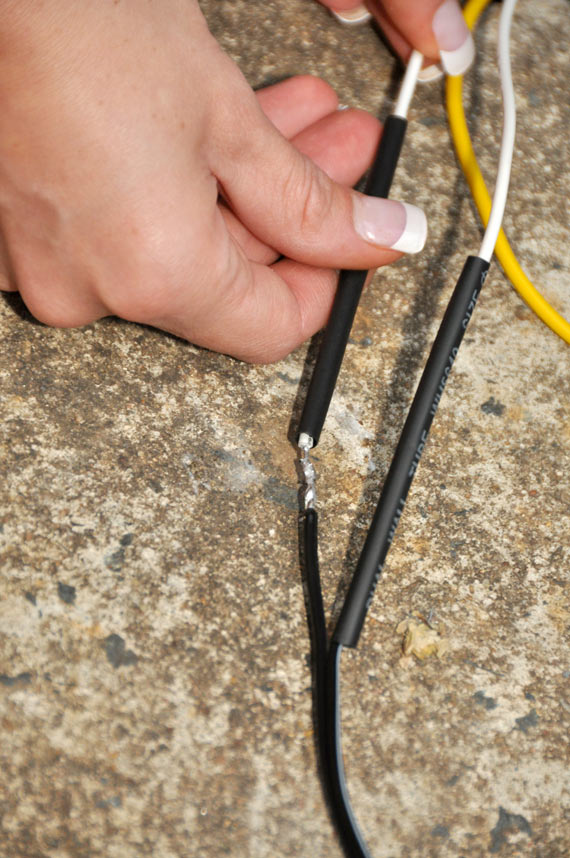
To solder, twist the ends of the two wires together. You can also tin the wires - this is where you put solder on each end of the wire, then solder them together. Twisting can work well too. Note the black heatshrink on the white wire, this is to act as insulation.
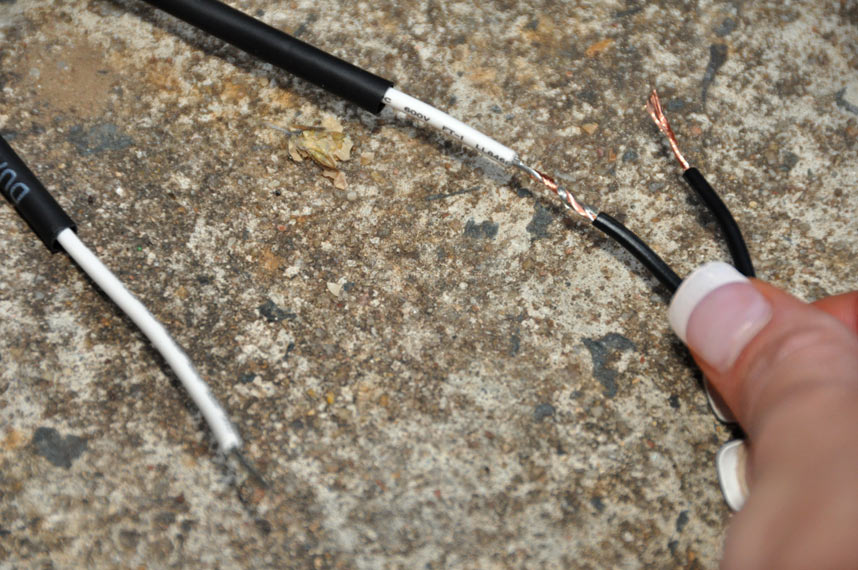
Wires twisted together.
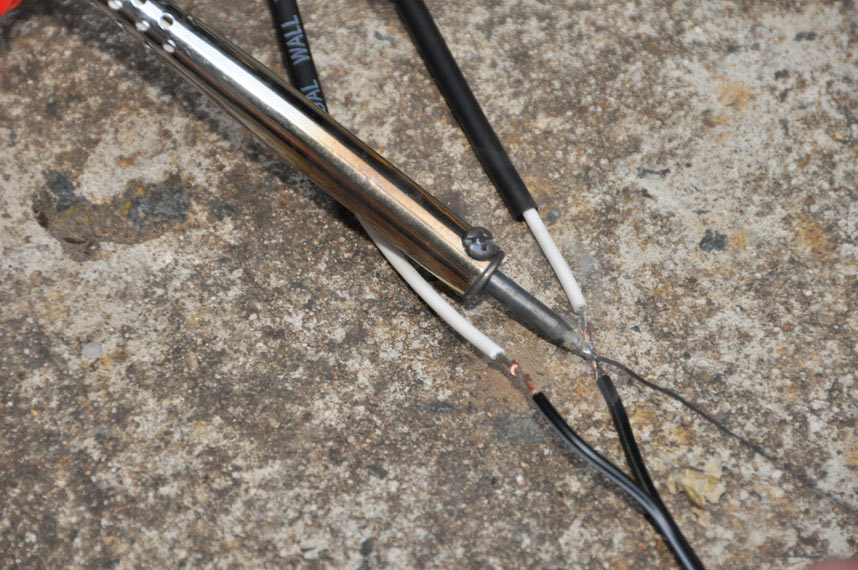
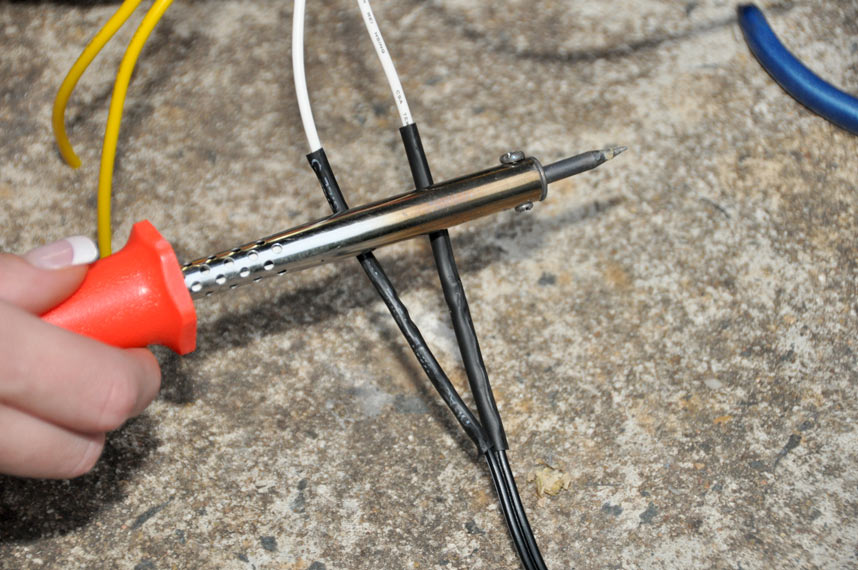
Soldering iron heating up the wires, and solder being fed in to join the wires. [note: I didn’t burn myself once – so it’s really easy – think welding on a tiny scale!]
After months of fking around having to take it off everytime I needed/wanted to put it up on stands we bought one of these:
Hehehehehhehehe – Youtube/Google ‘Stebel compact nautilus horn’ it’s full of win!
When I first got my bike, my wonderful Mom (brownie points for mentioning her) bought me a Motorcycle GPS. It’s the same as your regular Navman or TomTom, except it’s waterproof, comes with a handlebar mount and the screen is able to be used whilst wearing gloves!
It had lived in the box since the day I got it, only ever pulling it out of the box to have a play. Nifty little thing it is, really voids the whole “I need a clear tank bag so I can put maps in it” thing. WIN!
Supamodel bought me a set of Oxford Heated grips months ago and it was one of those ”oh next weekend” jobs, that we never got around to.. So this weekend just passed it was time to install the GPS, the heated grips and the Stebel Compact Nautilus horn and tinker with the wiring to provide power (only when the bike is on) for my GPS.
The Plan - made entirely of win.
------------------------------------------------
The plan was to install two relays. One would provide switched power for the heated hand grips and the GPS. The other would work for the horn: Stebel horns pull so much more power than normal horns they need upgraded wiring & switching.
For those that don't know, relays take a signal of a low power (which can go through a switch), and bring in a high-power source (usually a BIG FAT lead from the battery). They are useful for devices that require more power than can go through switches.
I’m a complete numpty when it comes to this electrical gizmo stuff, but apparently its really simple and it helps to know a couple of techniques. So here's how I soldered wires to join them, and how to do crimp connectors. Some people love them, some people hate them... This is not the only way to do electrical stuff, just how I did it.
Stripping the ends of wires isn't hard, just use side cutters to cut through the insulation. Or your teeth (not recommended!)
Pull the end off and twist, to bring the wires together.
To solder, twist the ends of the two wires together. You can also tin the wires - this is where you put solder on each end of the wire, then solder them together. Twisting can work well too. Note the black heatshrink on the white wire, this is to act as insulation.
Wires twisted together.
Soldering iron heating up the wires, and solder being fed in to join the wires. [note: I didn’t burn myself once – so it’s really easy – think welding on a tiny scale!]
Re: Project Buzz: 09 Ninja 250r
Wed Feb 16, 2011 12:06 pm
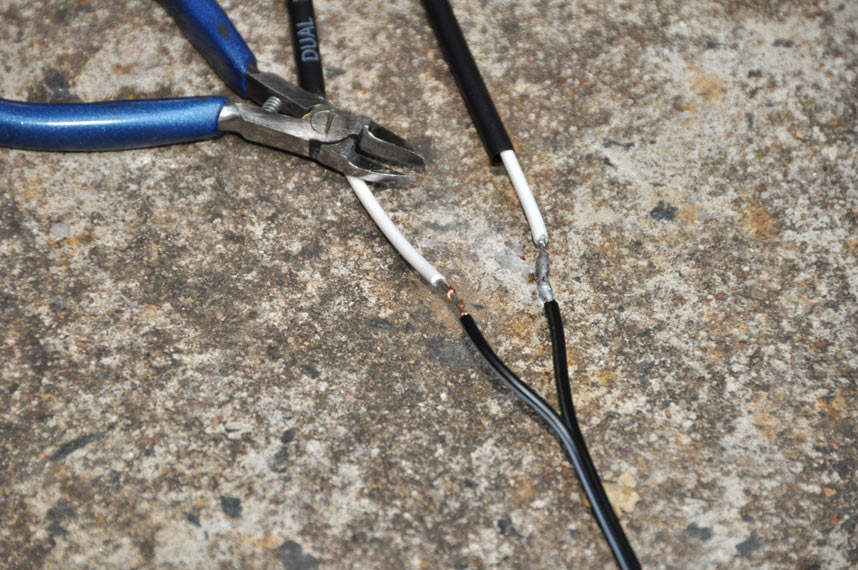
Completed joint. Not the best soldering job in the world, but it is solid and will do the trick. This wire won't move around much so it should work just fine.
Heat shrink tubing pushed down over the joint. Now it needs to be shrunk down to my size!
Heat shrink tubing is, well, duh, shrunk by heat
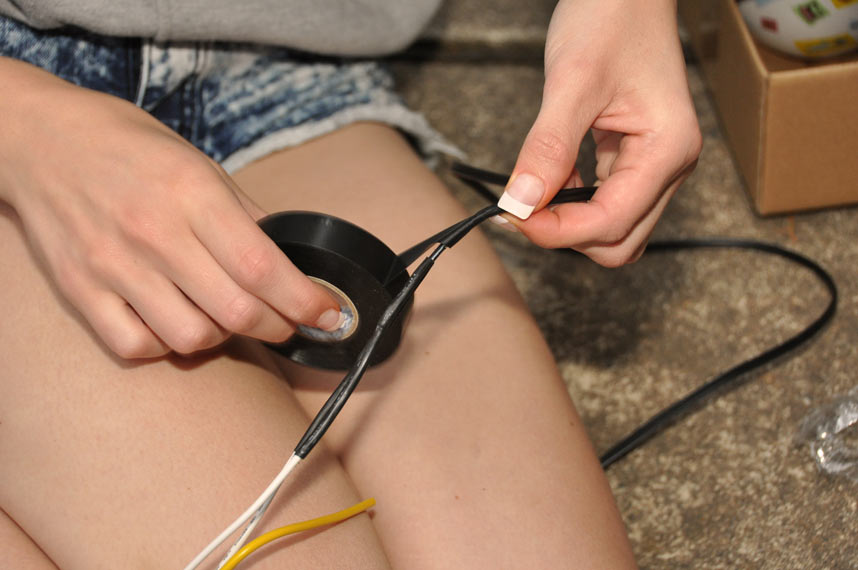
Taping it all up so that the connection is nice and firm and 100% water tight. Use good electrical tape, crap stuff never sticks properly. Nitto tape FTMFW!!!
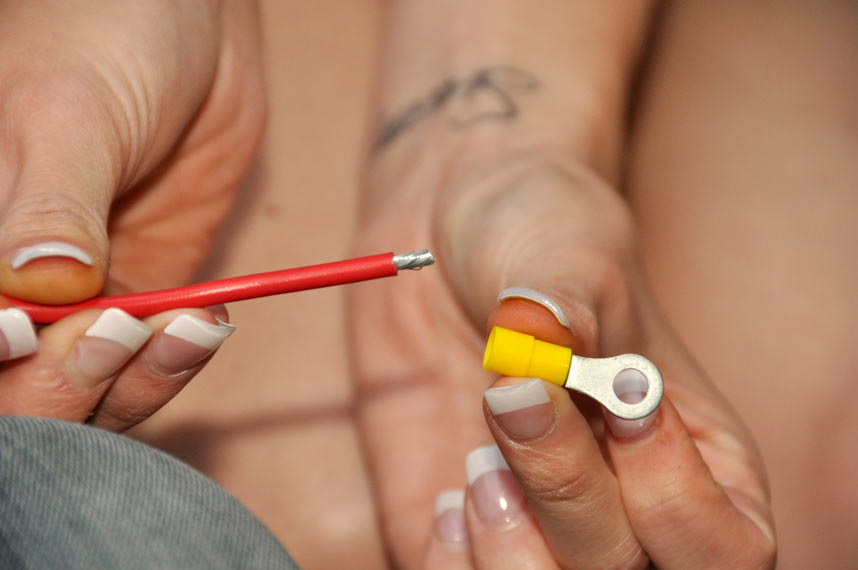
Crimp connector: strip the end of the wire (don’t use your teeth), and push it into the connector. The colours of the connectors indicates the wire sizes used in them. Yellow is the biggest wire size, then blue is medium, and red is Small. Or Miz. hahahaha
Re: Project Buzz: 09 Ninja 250r
Wed Feb 16, 2011 12:07 pm
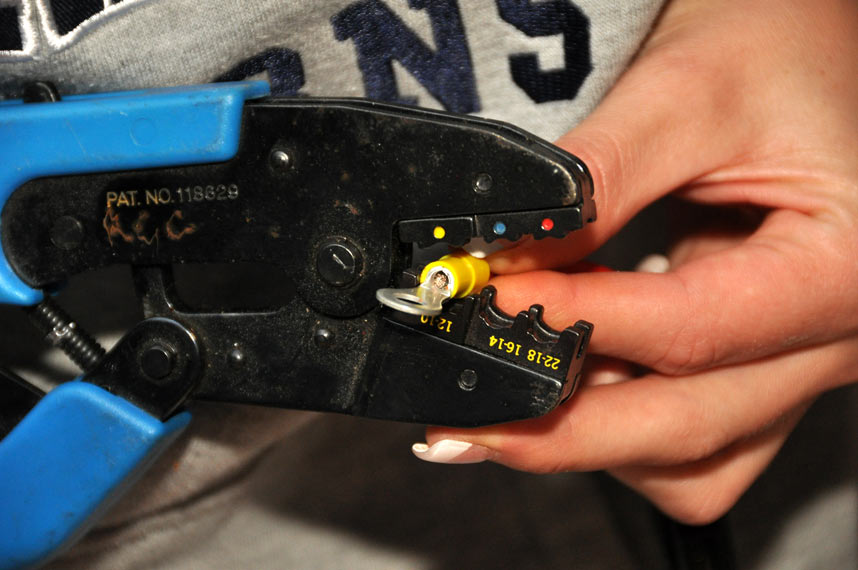
Using a pair of crimp pliers, crimp it.
They are a lot easier to use than soldering, but if they are not done properly they can easily come undone. Trust me, much frustration occurs when you plug it all together and shit don’t work It can be useful to solder in them, too.
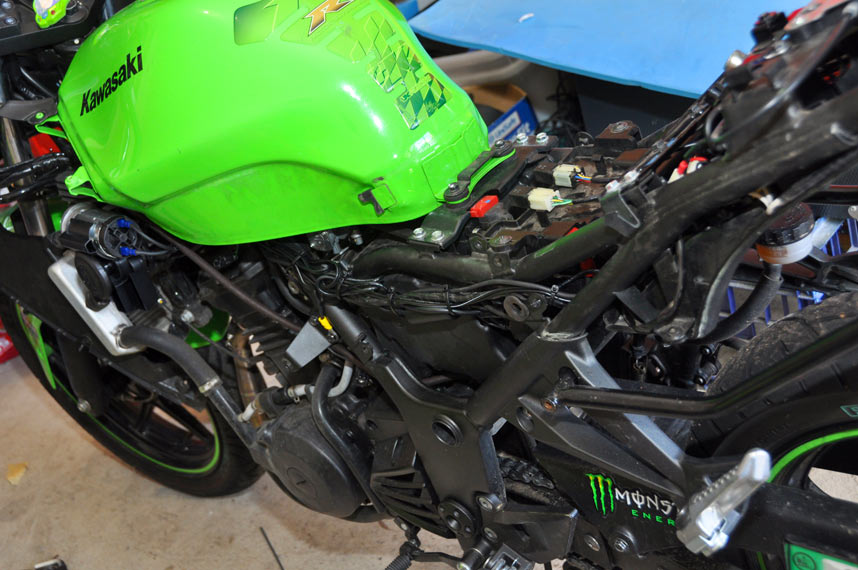
To start with, you have to hide the relays somewhere. I chose under the tail.
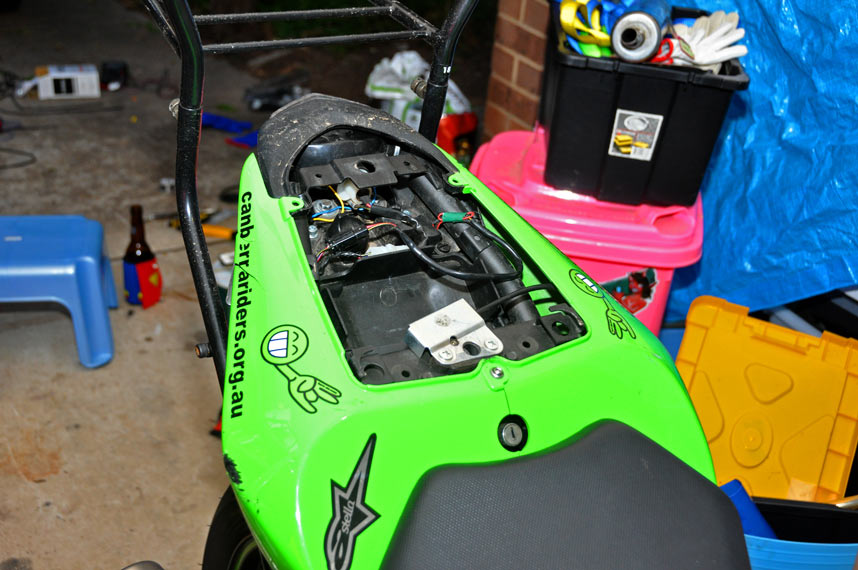
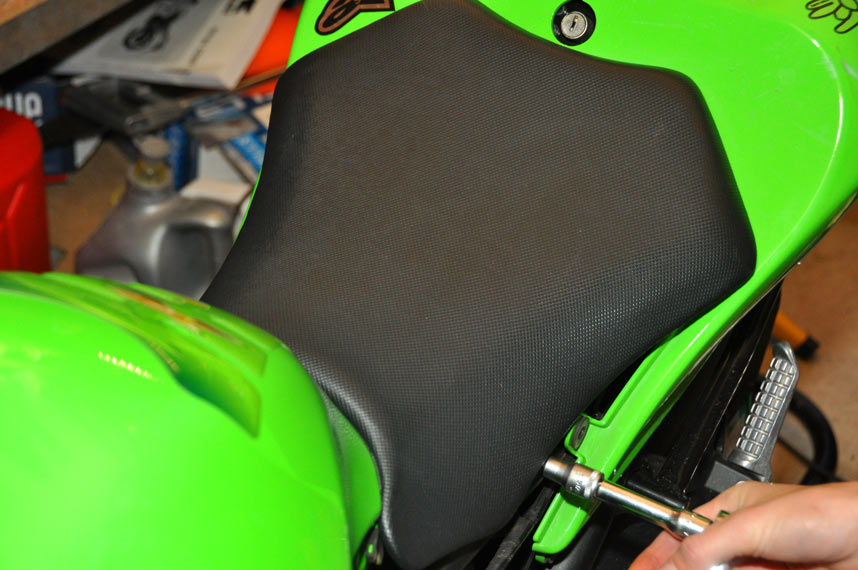
The black side panels have to be removed, then remove the seat.
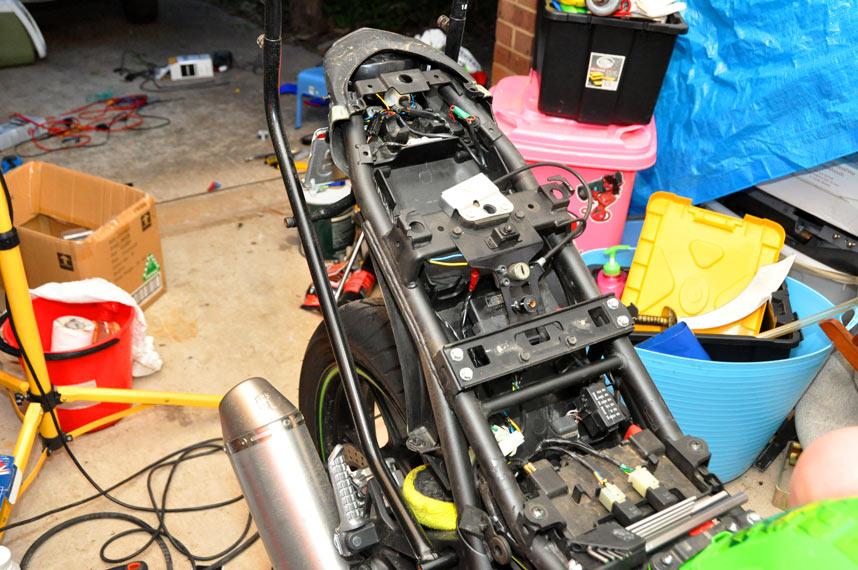
Remove the two sides of the tail, and the whole back end of the bike is exposed.
To mount the relays, I decided to use some bolts through the plastic undertray. There was already a hole which had the indicator flasher unit mounted to it, but on the other side, the drill had to come out.
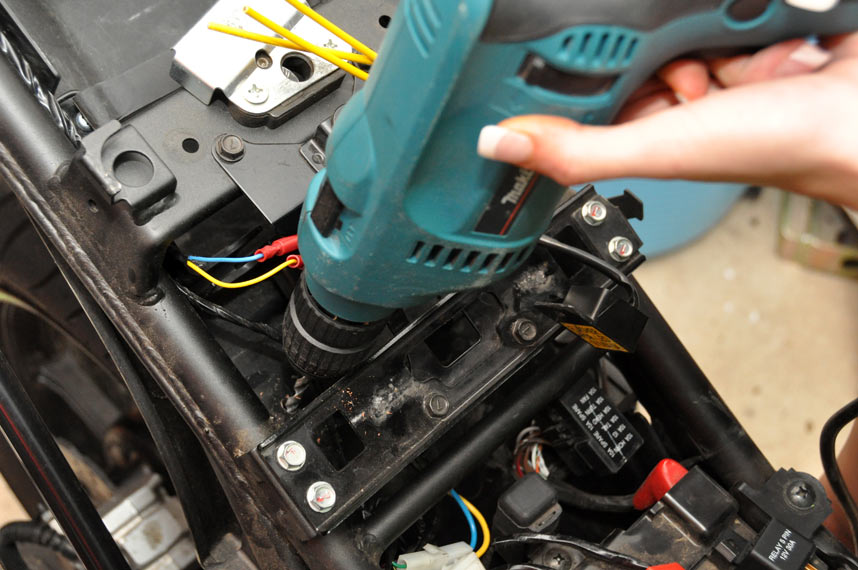
Drilling the hole for the relay. Note, I drilled ONE hole and one hole only, then put the power tool away!
Last edited by MIZ RX3 on Wed Feb 16, 2011 12:08 pm, edited 1 time in total.
Re: Project Buzz: 09 Ninja 250r
Wed Feb 16, 2011 12:08 pm
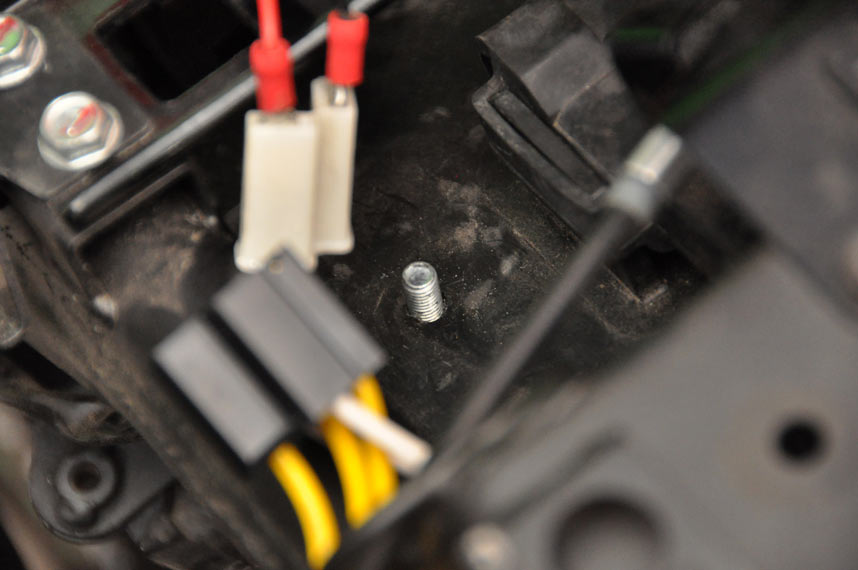
Bolt poking through the undertray.
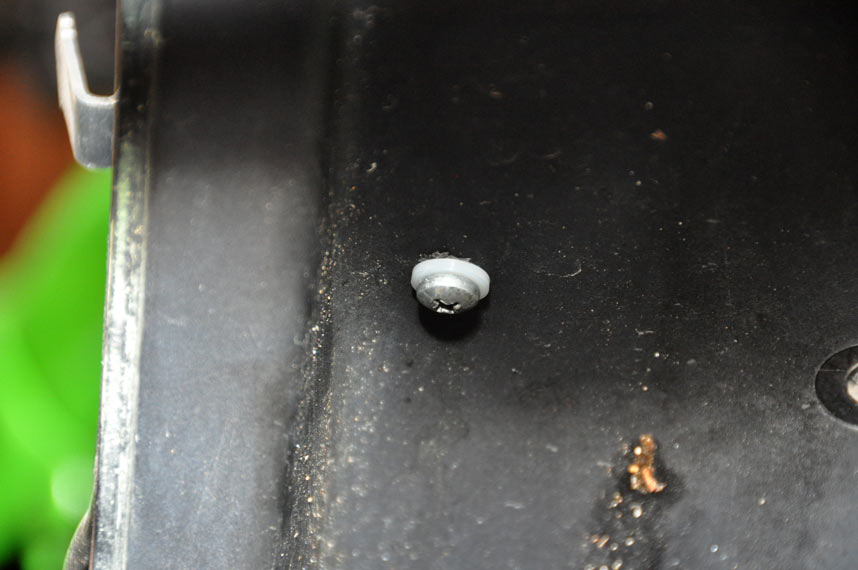
Bolt from underside. Nylon washer helps to not trash the undertray, and also helps for water sealing.
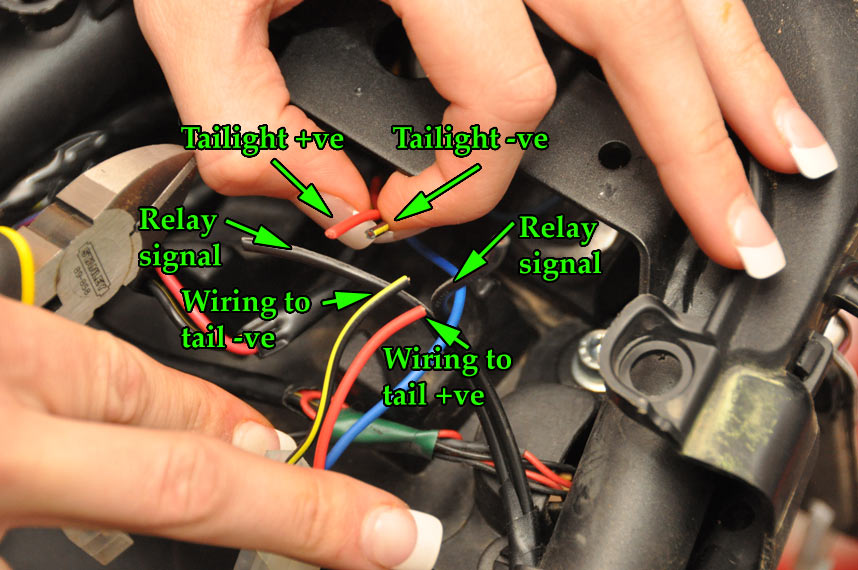
Wiring up the relay isn't hard. To get switched power that works when the ignition is on, easiest to use the tail light.
What we want to do is here is connect the relay signal side to the tail light. After determining what wires are what, it's a case of joining them so that a circuit is made to both the tail light and to the relay signal. Got to play with the mutlimeter here!
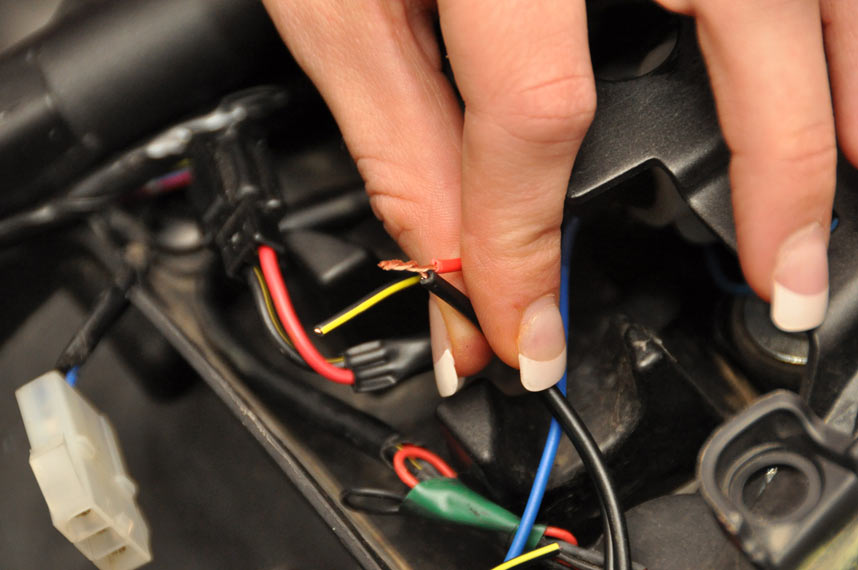
Tail light side and relay signal wire joined together.
Crimp connector. Makes it easier to unplug if I really need to.
Re: Project Buzz: 09 Ninja 250r
Wed Feb 16, 2011 12:08 pm
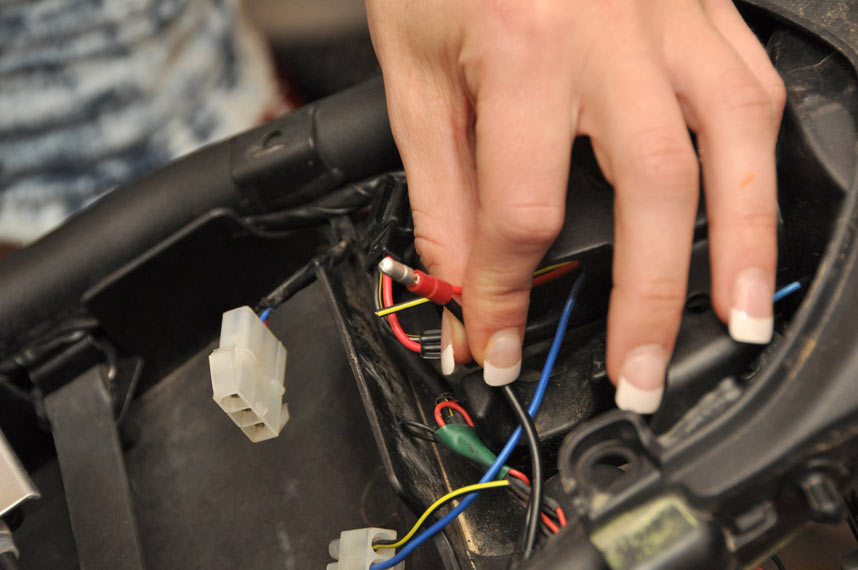
All the tail light wiring, all done up neatly. Black wires on the right-hand side go down to signal the relay.
Signal to the horn relay is easier: just connect to the original horn wiring, and run them up to the horn relay in the tail.
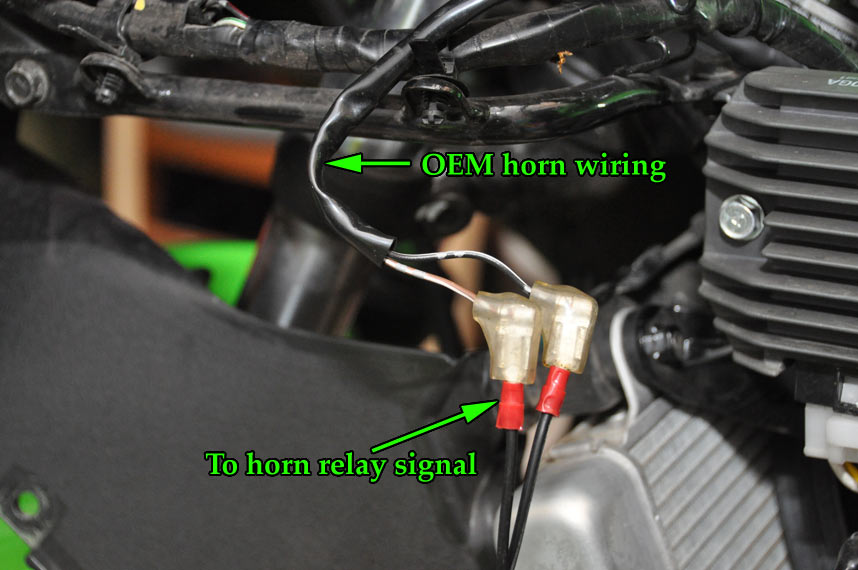
How to wire up the horn relay signal side.
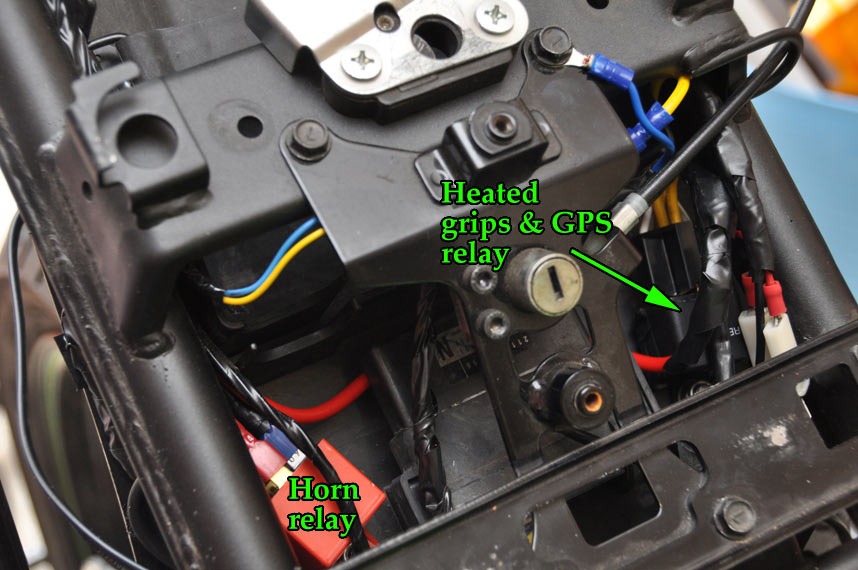
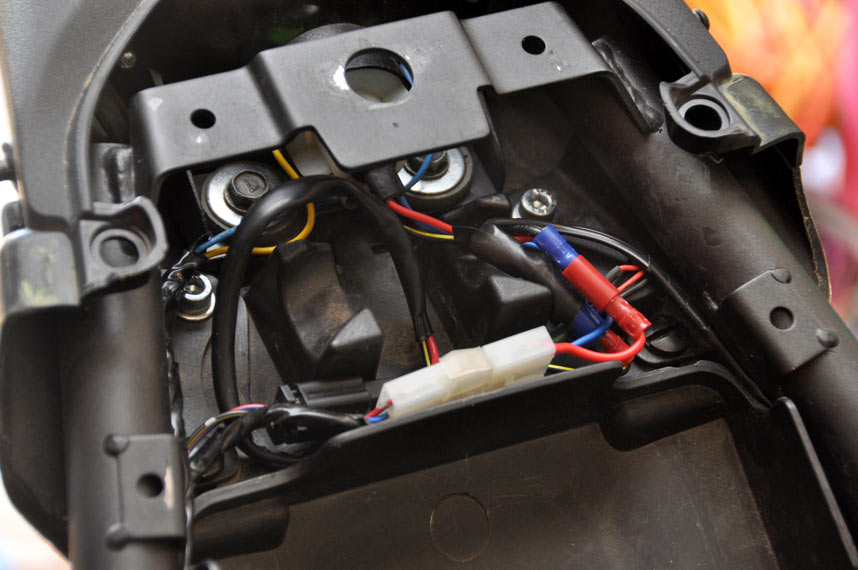
All the relays installed.
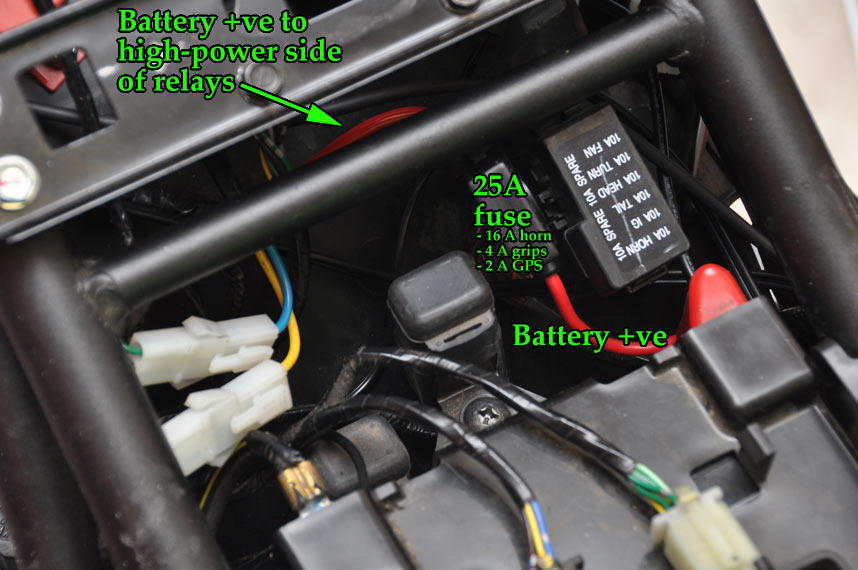
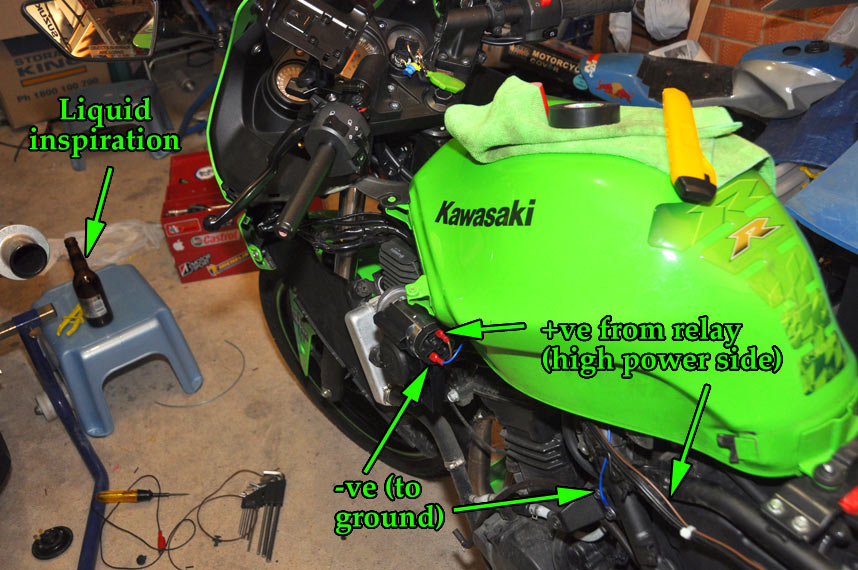
The high-power sides of the relays are fed from a dedicated lead that is connected to the battery. A fuse sits inline to protect everything. I ran one lead, but it goes to both the input high power side of the horn and the accessories relay.
All the wiring, just needing to be taped up now.
Re: Project Buzz: 09 Ninja 250r
Wed Feb 16, 2011 12:09 pm
Stebel Compact Nautilus air horn
---------------------------------------------
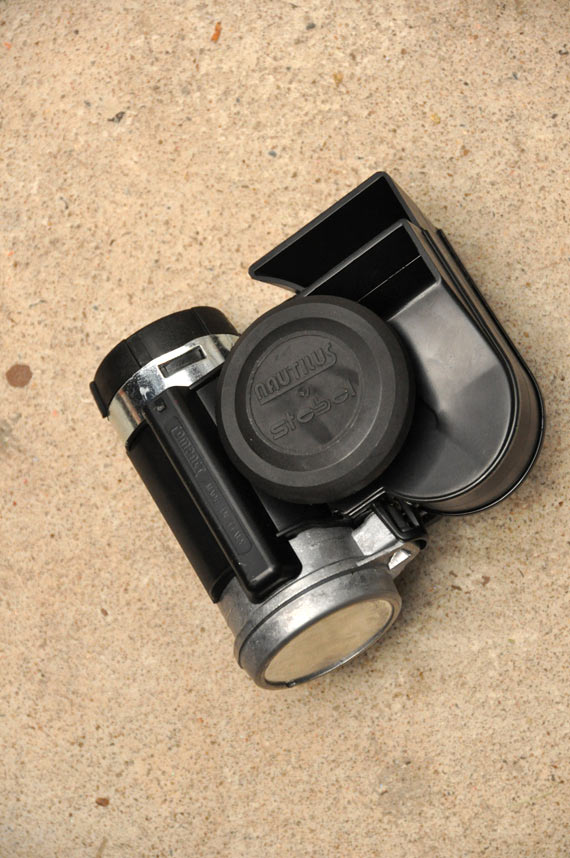
Look at my horn, my horn is amazing.
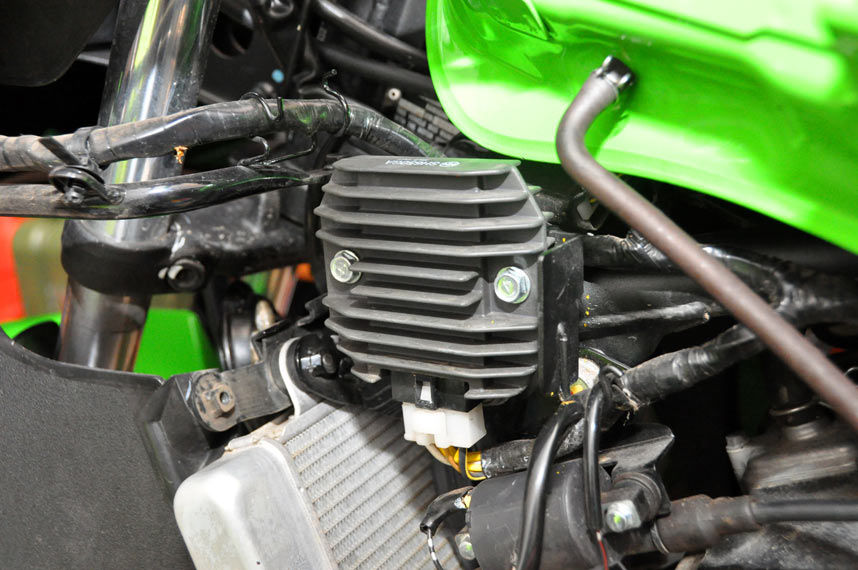
Best mounting point I could find was out this bracket poking out from the reg/rect.
6mm hole drilled in bracket, then an M6 bolt and lock nut works perfectly here. Need to use extension to do up bolt, but it works.
Bringing power to the horn isn't hard.
Note the wiring. I redid this with higher current wiring later, mainly to ensure it was absolutely going to handle the 16+ amps that the horn needs.
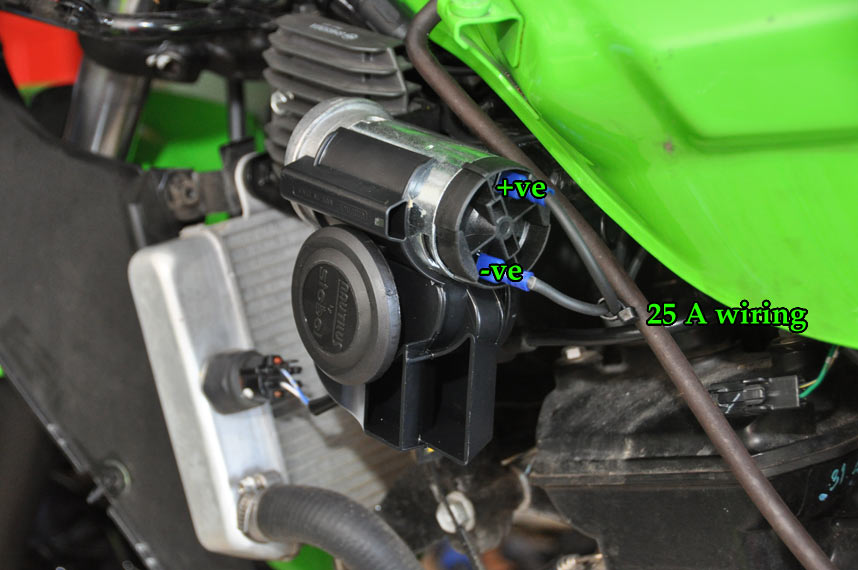
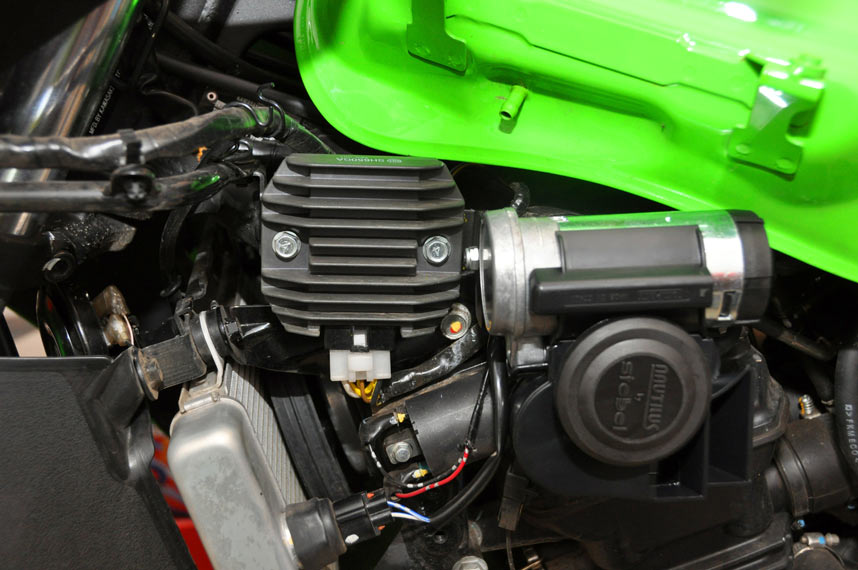
Redone wiring will help .
.
With that done, the horn mounts perfectly. It just clears the tank and it also doesn't hit the fairing. It's a little bit visible in the cutout in the left-hand fairing but not too much. It's also VERY LOUD!
---------------------------------------------
Look at my horn, my horn is amazing.
Best mounting point I could find was out this bracket poking out from the reg/rect.
6mm hole drilled in bracket, then an M6 bolt and lock nut works perfectly here. Need to use extension to do up bolt, but it works.
Bringing power to the horn isn't hard.
Note the wiring. I redid this with higher current wiring later, mainly to ensure it was absolutely going to handle the 16+ amps that the horn needs.
Redone wiring will help
With that done, the horn mounts perfectly. It just clears the tank and it also doesn't hit the fairing. It's a little bit visible in the cutout in the left-hand fairing but not too much. It's also VERY LOUD!
Re: Project Buzz: 09 Ninja 250r
Wed Feb 16, 2011 12:09 pm
Oxford heated grips (and power for my GPS)
------------------------------------------------------------
Installing the grips isn't hard, especially once a switched power supply is obtained. Although Oxford say they can go through a normal set of wires etc, the piece of mind of them only being on when the ignition is on is a good thing. With the power sorted out by the relay switched by the tail light, it's time to get to the installation of the grips.
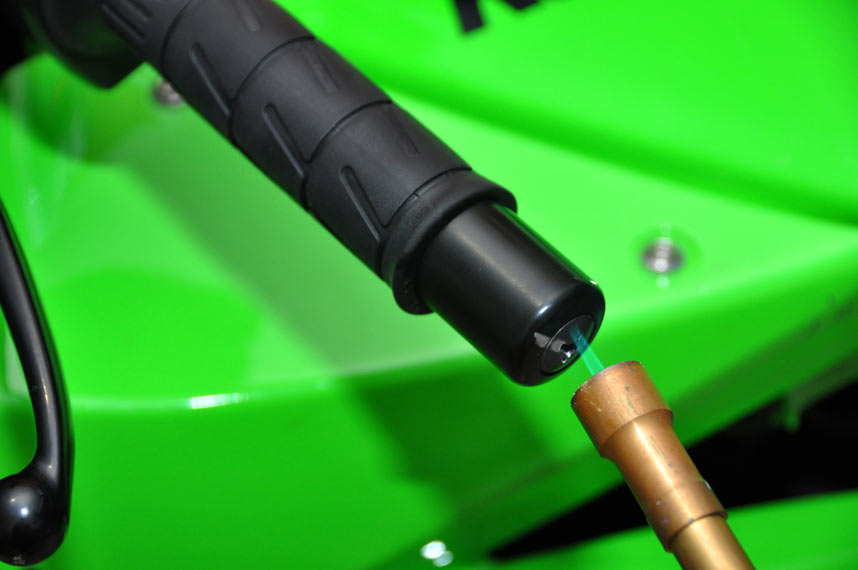
For some reason, Kawasaki thought using heaps of red loctite on the bar end screws was a good idea. Silver line is so you can tell if the screw is actually rotating. Heat them up with a blowtorch...(any excuse)

... and use an impact driver bit with a big hammer to provide a shock to the bolt (tap it hard). Heat + shock pwns loctite.
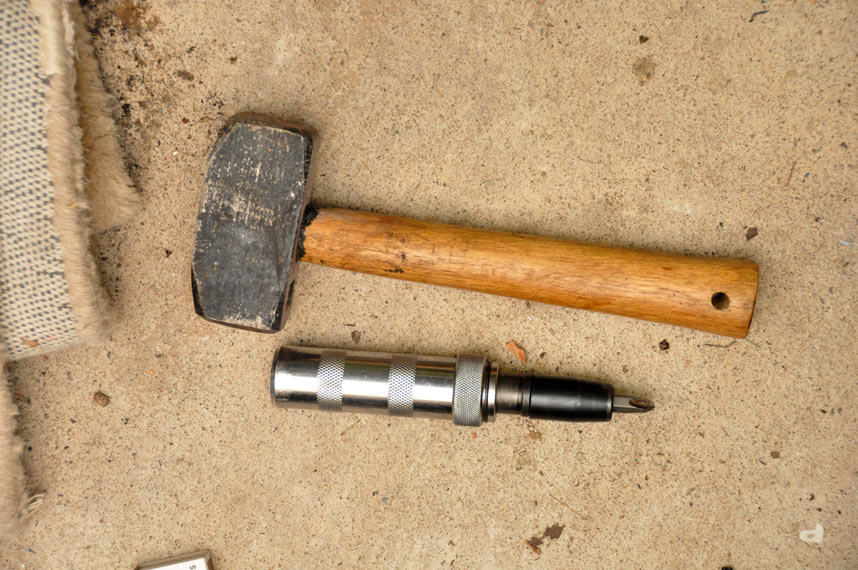
Speaking of an impact driver, you'll need one and a big hammer to do this job. For those who haven't used one, put it onto the screw, push it down and turn it to the left to preload the impact driver part. Then SMACK IT. SMACK IT so hard that if you missed, you'd break your hand.
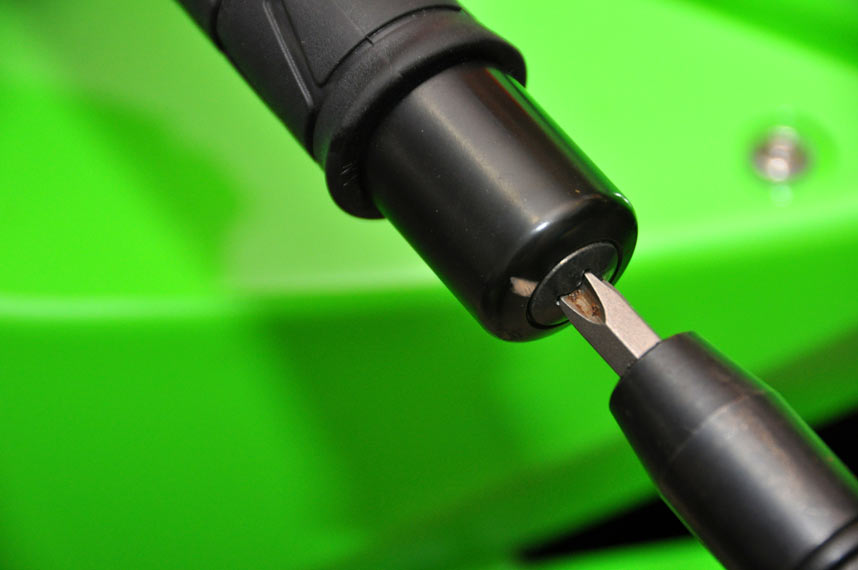
Screw is coming undone here. One hard tap turned it around, so the heat and shock did work.
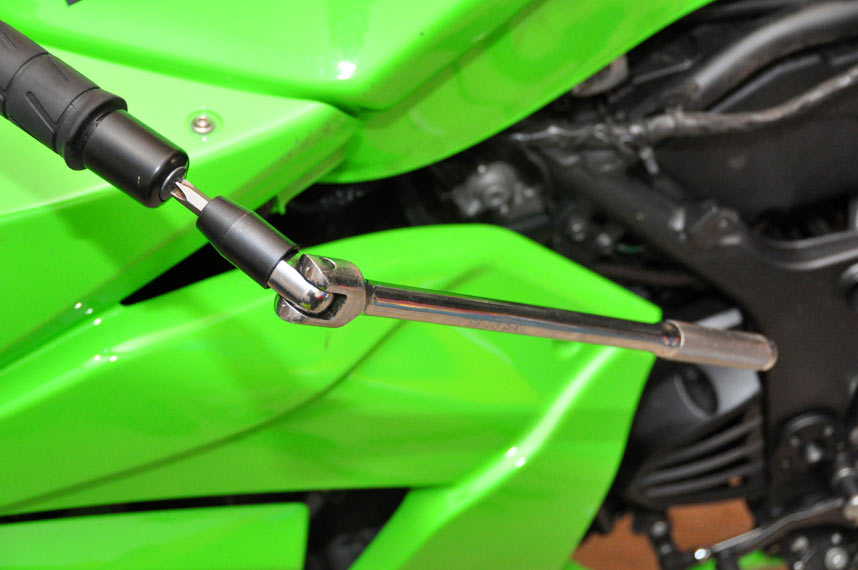
To finish up, use a breaker bar. Impact driver head that can go on a breaker bar is awesome.
------------------------------------------------------------
Installing the grips isn't hard, especially once a switched power supply is obtained. Although Oxford say they can go through a normal set of wires etc, the piece of mind of them only being on when the ignition is on is a good thing. With the power sorted out by the relay switched by the tail light, it's time to get to the installation of the grips.
For some reason, Kawasaki thought using heaps of red loctite on the bar end screws was a good idea. Silver line is so you can tell if the screw is actually rotating. Heat them up with a blowtorch...(any excuse)
... and use an impact driver bit with a big hammer to provide a shock to the bolt (tap it hard). Heat + shock pwns loctite.
Speaking of an impact driver, you'll need one and a big hammer to do this job. For those who haven't used one, put it onto the screw, push it down and turn it to the left to preload the impact driver part. Then SMACK IT. SMACK IT so hard that if you missed, you'd break your hand.
Screw is coming undone here. One hard tap turned it around, so the heat and shock did work.
To finish up, use a breaker bar. Impact driver head that can go on a breaker bar is awesome.
Re: Project Buzz: 09 Ninja 250r
Wed Feb 16, 2011 12:10 pm
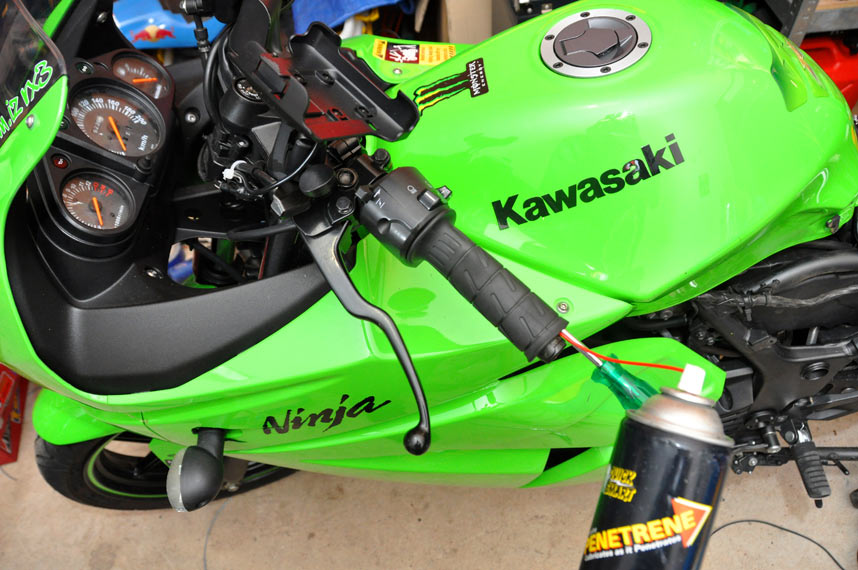
To release the grips, some people used compressed air, some people cut them off. Sliding a screwdriver (Phillips head works better - less likely to puncture the grip) helps, as does heaps of Penetrene.
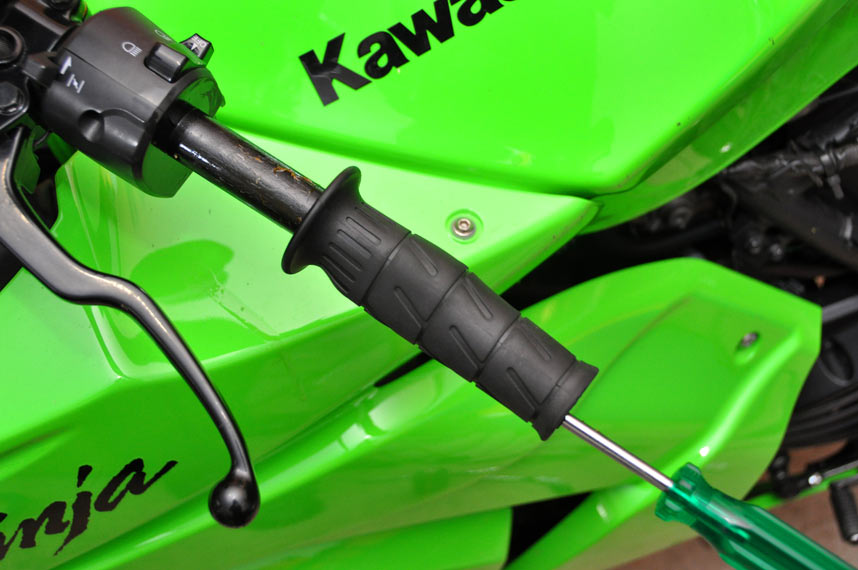
After working the screwdriver all the way around, the grips come off easily.
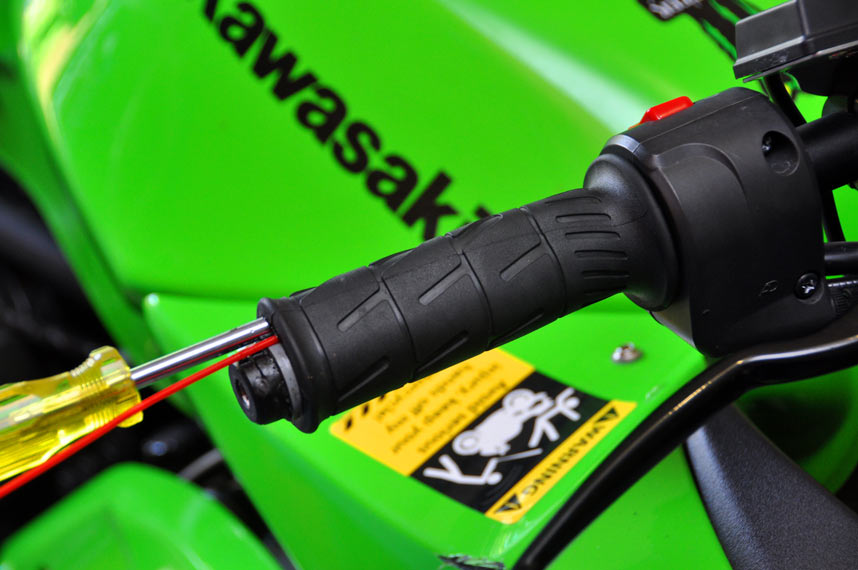
Same deal with the throttle - screwdriver plus lube removes them easily. There is a lip up near the switchgear that the grip needs to be lifted off, too.
Grip being removed, showing the lip.
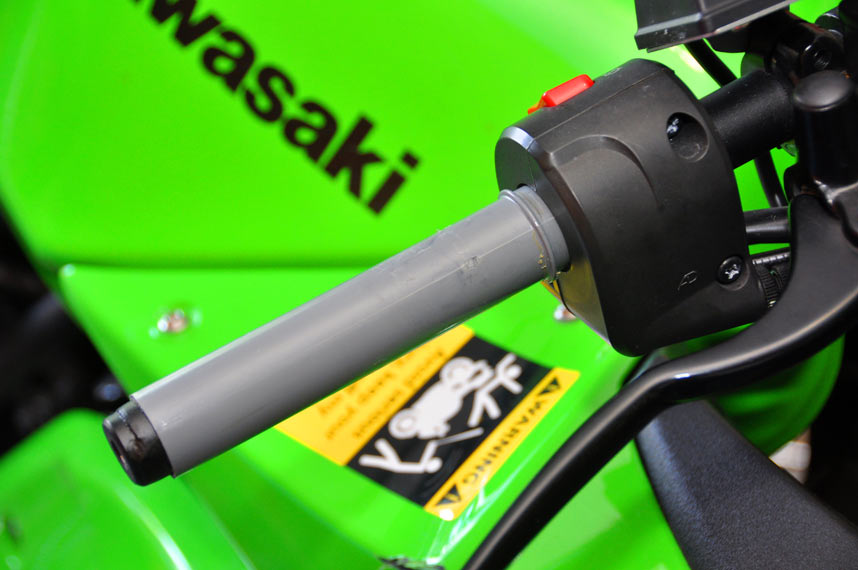
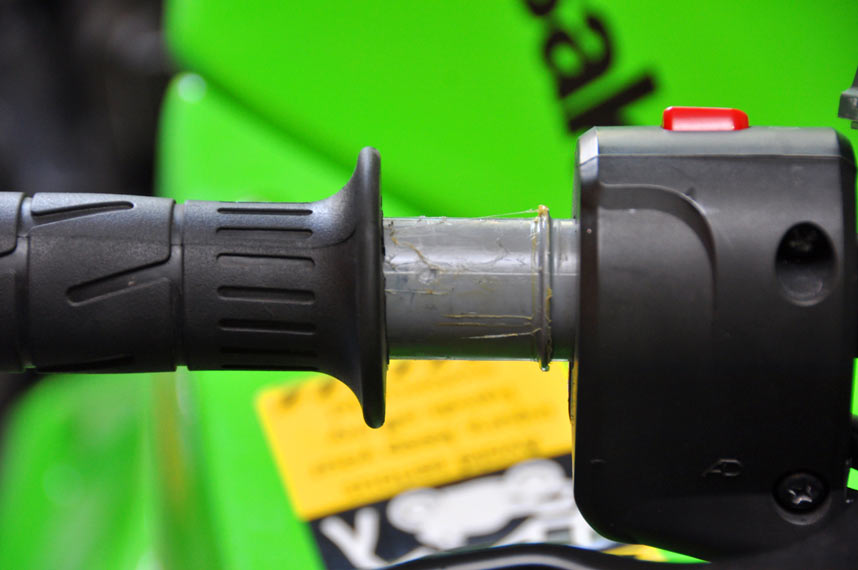
Throttle tube exposed.
Re: Project Buzz: 09 Ninja 250r
Wed Feb 16, 2011 12:10 pm
The heated grips come in two sizes: one has a bigger internal diameter, which goes on the throttle. On a lot of bikes, you have to remove ridges on the throttle tube so the grip goes on nicely. On the 250R you don't have to, but the throttle tube was a bit fat to let the grip go on, so it helps to shave it down with a file and some sandpaper.
Grip shaved with a file and sandpaper.
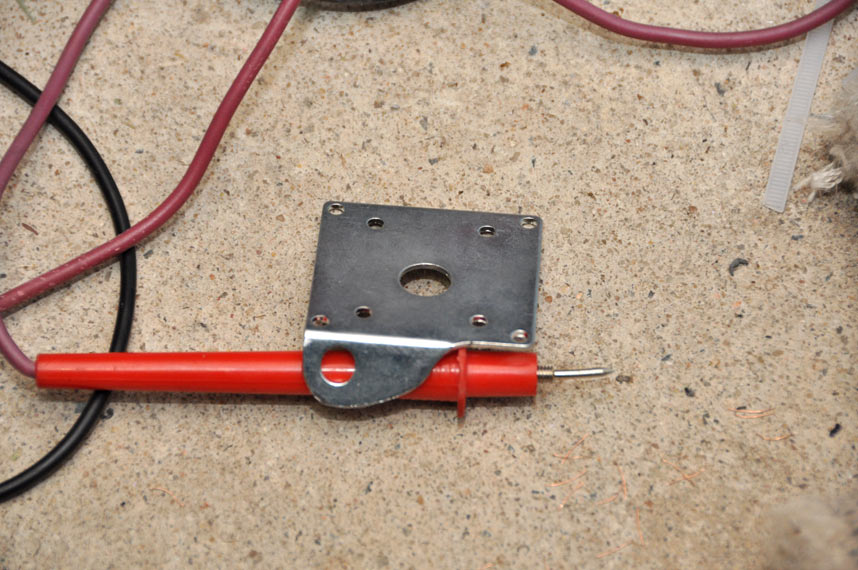
The mount for the heated hand grip controller is not exactly perfect for a 250R. The bolt holes are too far apart to work with the standard controls. Cutting the bottom off and shaping it so it looks ok is what is needed.
Grip controller screws to the supplied bracket.
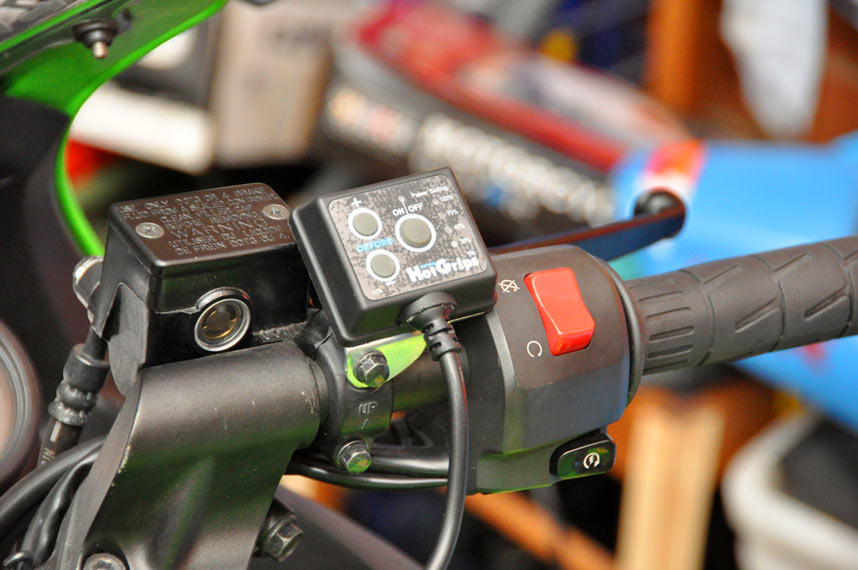
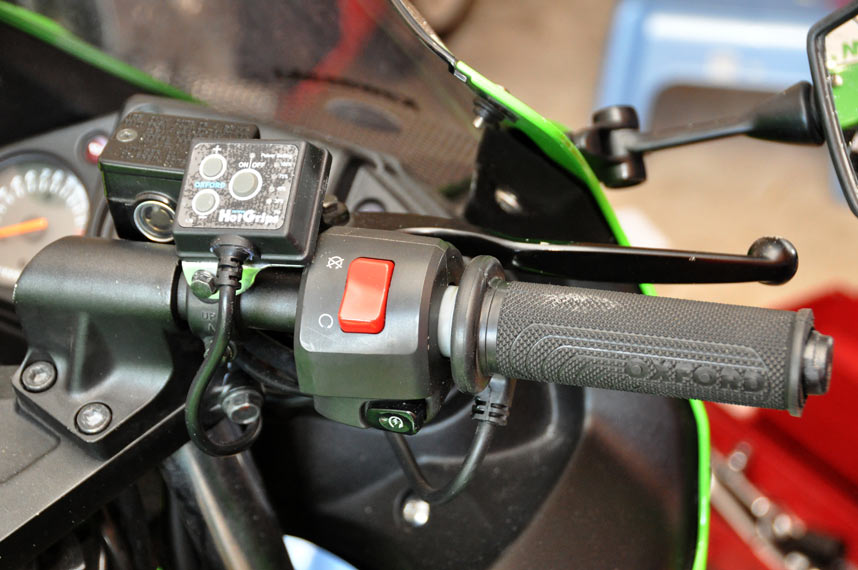
Grip controller mounts to the controls then. Could have spaced it out a bit but this kept it all nice and compact. It doesn't touch the switchgear, once the mount is bent a little.
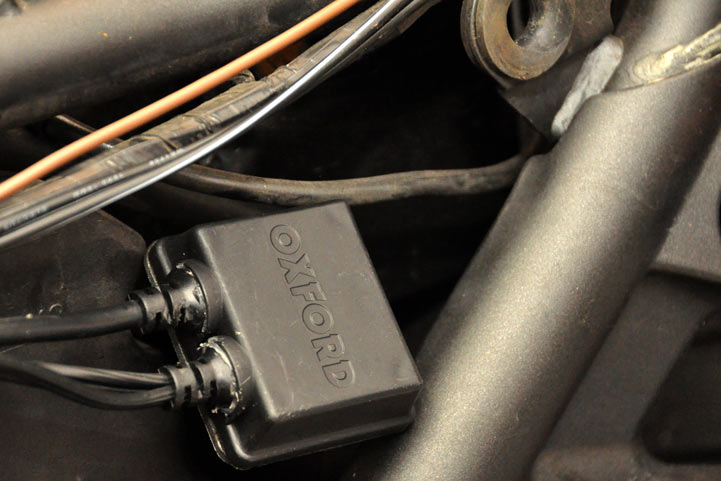
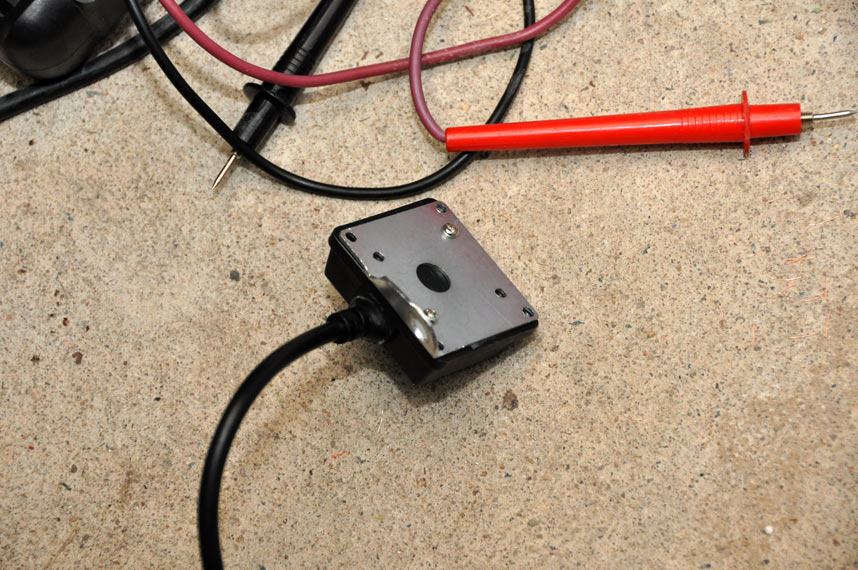
The other end of the controller - this is the bit that actually switches everything. It comes with double-sided tape to hold it somewhere. I stuck it to the side of the battery box. It'll be covered by the tail of the bike, and keeps it all out of the way.
Grip shaved with a file and sandpaper.
The mount for the heated hand grip controller is not exactly perfect for a 250R. The bolt holes are too far apart to work with the standard controls. Cutting the bottom off and shaping it so it looks ok is what is needed.
Grip controller screws to the supplied bracket.
Grip controller mounts to the controls then. Could have spaced it out a bit but this kept it all nice and compact. It doesn't touch the switchgear, once the mount is bent a little.
The other end of the controller - this is the bit that actually switches everything. It comes with double-sided tape to hold it somewhere. I stuck it to the side of the battery box. It'll be covered by the tail of the bike, and keeps it all out of the way.
Re: Project Buzz: 09 Ninja 250r
Wed Feb 16, 2011 12:11 pm
Grips are easy to install. You use some superglue: put most of it up the far end of the throttle tube or the bar, otherwise you'll only get the grip on halfway before the glue sets and you won't be able to finish the job. Trimming the ends isn't always necessary, but I did it on the throttle side so it wouldn't get caught on the bar end and stop the throttle returning properly.

There is a Y adapter that comes from the power controller of the heated grips (the one stuck to the side of the battery box). This goes up to provide power to the grips themselves. I stuck this underneath the ignition switch to keep it all neat. Make sure that the wires don't get pinched when the steering is turned!
No final pics, after all, it just looks like the same bike: everything is all hidden, which is the mark of a good electrical installation!