Making a bike suit your needs, not the manufacturers.

For general Technical and Performance Discussions

Re: Making a bike suit your needs, not the manufacturers.

Postby mike-s » Sat Jul 02, 2011 11:59 pm

Dummy fit of the cut bash plate
Image

Image

I'll likely make a mount on the downtube, and on the crashbar mount points at the front. Got a couple of ideas in the works for the rear though.

Looking forward to the new brakelines arriving so i can give her a good run to see just where she is at, good & bad suspension wise.

P.S. hacksaws SUCK, but sometimes are simply the best tool available for the job at hand, better part of an hour to cut those two corners off!.
Image
If it hurts, you aren't doing it right.
User avatar
mike-s
Apprentice Post Whore :-)
 
Posts: 6142
Joined: Sat Aug 07, 2004 5:43 am
Location: Arncliffe, Sydney
Bike: Suzuki
State: New South Wales

Re: Making a bike suit your needs, not the manufacturers.

Postby mike-s » Thu Jul 14, 2011 5:24 pm

Haven't donemuch for a while. Have recieved a custom brake line from a guy in melbourne for $40 or so. fitted it, then realised the speedo cable is now 6cm too short :roll:. Found someone that's willing to take my cable and put the ends on a new inner & outer cable. But as the guy wants $75 for his efforts, i'm holding off until payday!

In the meantime i'm thinking of taking the engine out to try and clean the frame and engine up a little. However the RF is being a recalcitrant bastard and getting in the way. There's freaking bits of fairings EVERYWHERE in the garage at the moment i need to crack out a electrical schematic and a multimeter to figure out just what in the hell has gone wrong as the load-free indicator relay ont work, nor will a spare i had sitting in the garage, unused :cry:. Electrical gremlins fuggin suck.
Image
If it hurts, you aren't doing it right.
User avatar
mike-s
Apprentice Post Whore :-)
 
Posts: 6142
Joined: Sat Aug 07, 2004 5:43 am
Location: Arncliffe, Sydney
Bike: Suzuki
State: New South Wales

Re: Making a bike suit your needs, not the manufacturers.

Postby mike-s » Sat Jul 30, 2011 10:47 pm

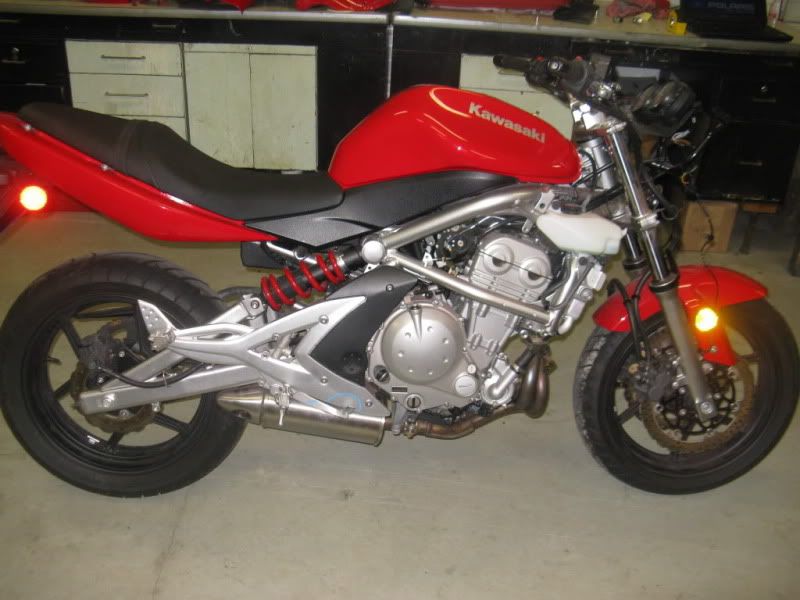
I've been waiting on getting a new brake line, and a custom speedo cable made, got those two show stoppers sorted out in the last week and fitted, so i rolled her out and took this photo this afternoon.
Image

Have been digging about trying to find the caliper mounting bolts and fortunately found them a little while ago. Have since put in the proper bolts and mounted the caliper and half mounted the front mudguard.

I've since discovered that the way i mounted the brake line was back to front and i need to take it off and mount it with the "kink" in the line at the top, not the bottom as the brake line pushes out to far towards the engine like you can see in the above photo, which although technically isn't a bad thing, it means i can't smoothly line it up with the retaining clip that holds it to the mudguard. Tomorrow i need to flip the mounting around so the brake line travels straight "up" the fork leg instead of out like it currently does.

I checked the static sag on the shocks and i think i need to back it off to the lowest setting as i'm still only getting about 1cm of sag when i sit on the bike, i should be getting about 2 to 2.5 from memory. It may well turn out these shocks are too stiff for the bike weight, which would be annoying, but I can easily get hold of another pair of 2nd hand ones if needed at a later date. I also suspect i need to reduce the preload on the front forks by reducing the spacer from an extra 2cm down to just 1cm of extra spacer. This should reduce the front end firmness quite a fair bit.

It's getting there, slowly. I'm looking forward to finishing off the suspension so i can spend a bit of time sorting out the bash-plate. Though major work on that will have to be put on the back burner due to the NZ trip next week.
Image
If it hurts, you aren't doing it right.
User avatar
mike-s
Apprentice Post Whore :-)
 
Posts: 6142
Joined: Sat Aug 07, 2004 5:43 am
Location: Arncliffe, Sydney
Bike: Suzuki
State: New South Wales

Re: Making a bike suit your needs, not the manufacturers.

Postby mike-s » Sun Jul 31, 2011 6:50 pm

Brakelines rerouted and attached to minimise rubbing against the triple tree. The suspension has also been put full back together and approx 150cc put in each fork. It turns out that once i got the calipers all firmly attached, there seemed to be a lot less stiffness on the front, so the level of preload i've given it seems to be ok, so far...

The rear shock has been put down to the softest setting and the level of give is much more "normal" now. I guess time will tell if it's stiff enough or if it indeed does need to be stiffened up a touch.

Unfortunately i didn't have enough time to get a test ride happening, but just having everything buttoned up and feeling right was enough for me to be satisfied with what i did today. The last thing i need to do (which i just plain forgot about) is re-attaching the chain guard.

obligatory photos.
Image

Image
Image
If it hurts, you aren't doing it right.
User avatar
mike-s
Apprentice Post Whore :-)
 
Posts: 6142
Joined: Sat Aug 07, 2004 5:43 am
Location: Arncliffe, Sydney
Bike: Suzuki
State: New South Wales

Re: Making a bike suit your needs, not the manufacturers.

Postby zxsixr03 » Thu Aug 04, 2011 4:57 pm

Coming along well....

This is a perfect example of making "something" out of something

Start Kwaka 650

Image

to

Image

Image

Image
Built by craftsman, Designed by a genius, Ridden by a twat....
User avatar
zxsixr03
KSRC Regular
KSRC Regular
 
Posts: 896
Joined: Mon Jan 24, 2005 7:04 pm
Location: Sydney
Bike: ZX6R
State: New South Wales

Re: Making a bike suit your needs, not the manufacturers.

Postby mike-s » Wed Dec 21, 2011 10:33 pm

It's been a while, other things have gotten in the way, but I've made time to make some progress.

Fixed the fork leak, took her out for a ride, and as it turns out, I put too much preload and shouldn't have cut the springs quite as much as i did. I ended up ordering a pair of brand new aftermarket progressives and am awaiting their delivery, I'll then just add a little extra preload to account for the extra weight, and won't screw around with the front end any further.

As per this thread, I now have a mig welder and I'm not too bad considering that I'm a rank amateur at it, more practice can be had to perfect it, but in the meantime I've modified the sidestand to a more appropriate length.

Image
The plan.

Image
Executed.

I need to dress the top of the foot a little to smoothen it out as insufficient amps were used in giving it a once over to add a bit of thickness to it.

Once that is done and assembled, the centre stand will be getting similar treatment.
Image
If it hurts, you aren't doing it right.
User avatar
mike-s
Apprentice Post Whore :-)
 
Posts: 6142
Joined: Sat Aug 07, 2004 5:43 am
Location: Arncliffe, Sydney
Bike: Suzuki
State: New South Wales

Re: Making a bike suit your needs, not the manufacturers.

Postby mike-s » Mon Jan 02, 2012 5:00 am

well I decided to start on the centre stand. I measured, planned and started cutting.

Image

First thing i realised is the rub plate was not standard, someone added it themselves, and burnt the plate in the process by using too many amps on their stick. They also touched up a nearby weld and left a nice big hole in there when the weld blew out. something else ill have to fix when i get the mig out.

As to my extension i am going to use some rod inside the stand for extra strength across the weld, i will also be using plug welds through the cuts to make sure it holds as i will be cutting the insert (not shown) i am using lengthways so i can size it up to match the diameter of the stand. It may not be explained clearly, but i know exactly what i am going to do and will leave it to pictures to do the rest when i post my next pic update. incidentally i am lengthening the centre stand a mere 15mm as it almost is long enough to be of use at it's current length.
Image
If it hurts, you aren't doing it right.
User avatar
mike-s
Apprentice Post Whore :-)
 
Posts: 6142
Joined: Sat Aug 07, 2004 5:43 am
Location: Arncliffe, Sydney
Bike: Suzuki
State: New South Wales

Re: Making a bike suit your needs, not the manufacturers.

Postby mike-s » Sat Jan 07, 2012 11:10 pm

Some of the surface welding on the extension part lacked the smoothness I desired thanks to some nasty spattering all over the top of what was an otherwise nice weld (hence no photos prior to grinding the surface smooth) but considering what i was able to see when actually doing the welds, I am reasonably happy with the resulting join and importantly the plug welds were ones I was extremely happy with and they all had a nicely pooled surface to boot.

After the welding i ground it smooth and painted it.
Image

Currently I'm awaiting new fork springs to come from the USA, sent about 2 and a half weeks ago and should be here soon.
I might start dicking about with figuring out how to start putting the bash plate on the bike. Current ideas for this are to weld a couple of nuts to the frame saddle and use bolts through the plate with locking nuts to hold it in place
Image
If it hurts, you aren't doing it right.
User avatar
mike-s
Apprentice Post Whore :-)
 
Posts: 6142
Joined: Sat Aug 07, 2004 5:43 am
Location: Arncliffe, Sydney
Bike: Suzuki
State: New South Wales

Re: Making a bike suit your needs, not the manufacturers.

Postby Six Addict » Sun Jan 08, 2012 10:26 pm

zxsixr03 wrote:Coming along well....

This is a perfect example of making "something" out of something

Start Kwaka 650

Image

to

Image

Image

Image


couldnt find a versys?
DUCATI HYPERMOTARD 2014
User avatar
Six Addict
Pinchy
Pinchy
 
Posts: 6465
Joined: Sun Apr 06, 2008 3:51 pm
Location: Darlinghurst, Sydney
Bike: Ducati
State: New South Wales

Previous

Return to General Tech & Performance Talk

Who is online

Users browsing this forum: No registered users and 17 guests